

1) Silver leaves. By far the most common problem is thrips sucking the chlorophyll out of the leaves, turning them silver and weakening the plant. Turn the leaf over and you may find black, thread-like insects on the back. Replace heavily infested plants – some varieties are more susceptible than others. Open up around the plant for more air movement and light. You can use a systemic insecticide – spray November, early January and, for really bad cases, late February. Neem oil is recommended by some as an alternative to insecticides.

2) Leaves with dry brown patches and edges. This is usually a sign of stress. The plant may be too dry or too hot. Move it if necessary (sun for half the day or dappled light is best) and get a blanket of mulch over the roots. Some varieties prefer a much colder winter than we have and these tend to burn and crisp on the leaves. Replace them. Some plants get touched by mildew and lichen. Open up to allow more air movement.

3) No flower buds. This is usually a sign of too much shade. Move the plant or open up around it to allow more light.

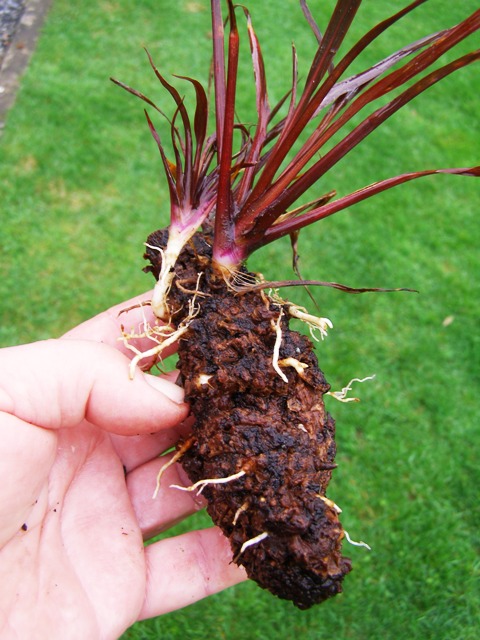
4) Leggy, bare and stretched. Again, this is usually a sign of too much shade. Some varieties have a tendency to get rangy and open, others are naturally more compact and bushy. You can rejuvenate a leggy plant by cutting back very hard but it is really too late in the season now. It is best done in the middle of winter. You are more likely to kill the plant if you cut it back to bare wood now. This plant was cut back hard two months ago and has made its new growth already.


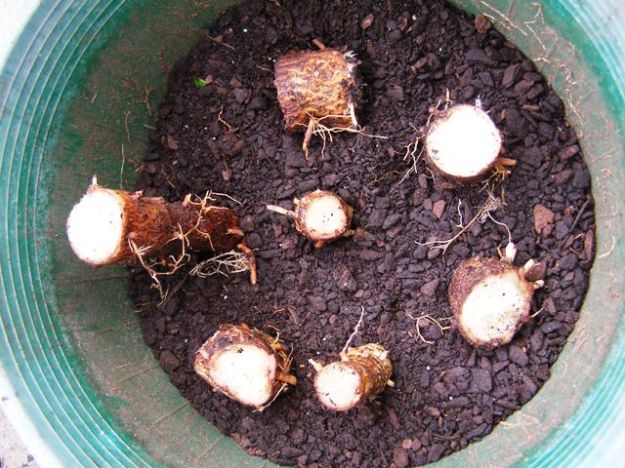
5) Plants which make only one new growth from each stem can be encouraged to make several growths by pinching out the single shoot. Do this as early as you can or you will be pinching out next year’s flower buds. In the right hand photo, you can see a plant making several new shoots instead of only one.

6) If not deadheaded, some rhododendrons set so much seed that it can weaken and even kill them. It can also reduce flowering the next season. This plant missed being deadheaded last year. Varieties that don’t set seed are generally deadheaded for aesthetic reasons, not because it is necessary.


 1) This tree aloe (Aloe thraskii) is in the wrong place and has been for at least fifteen years. Large plants can be moved, but this involves taking a large enough root ball to support the top. It is best carried out between late autumn and early spring so that the plant has a chance to settle in and put out new roots before summer.
  2) A large trench needs to be dug out, wide enough for you to stand in. This trench is around 60cm deep. Dig it with straight sides to start with. It allows you to look at the plant’s roots and to get access right underneath the plant. Keep it well out from the plant because you can make the root ball smaller but you can’t make it larger again.
 3) Standing inside the trench, start digging to excavate right underneath the plant. We wanted to keep the root ball relatively whole to act as an anchor because this plant is very top heavy. Gradually reduce the size of the clump, removing excess dirt, keeping a close eye on the root system. If it has a huge root system, you don’t want to be cutting into it too much. If it has a smaller root system, you can reduce it to a size that is more easily managed. We were surprised at how small the root system was on this plant and they were mainly on the surface.
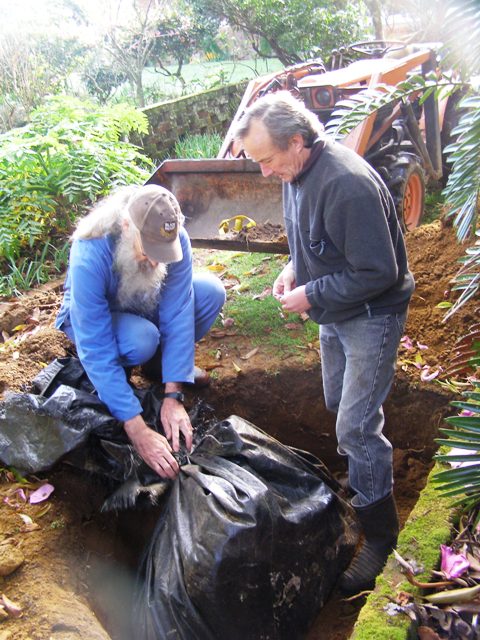 4) Get some heavy plastic, sacking or old weedmat underneath the plant. Do this by rocking the plant to one side and getting the wrapping right underneath it. This usually requires more than one person. Do not let the roots dry out at any stage. With very big plants, the plant can be raised out of the hole by tilting it to one side and backfilling that side. Then rock the plant back and put dirt in on the other side. Repeat the process until you have raised the plant to the level where you can lever it out of the hole more easily. We moved this plant on the front bucket of our baby tractor. You may need to do it by trailer.
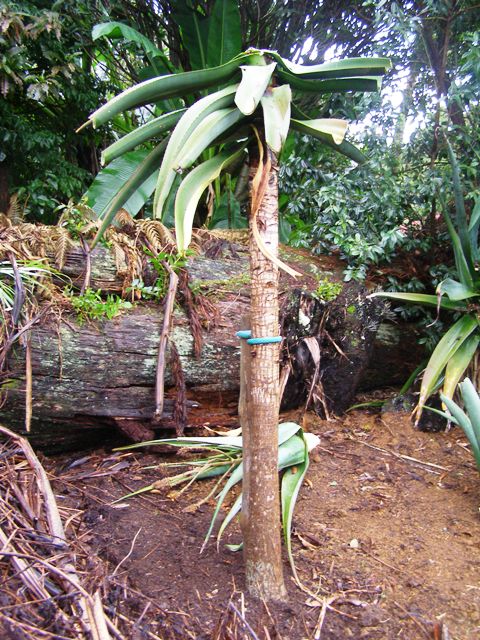 5) In this process, we had an accident and the heavy top was knocked out so we were forced to cut the the poor aloe back but there is no reason why it should not recover. Get the planting level as close as possible to where was. Measure the depth of the root ball and the depth of the hole before planting by placing a board across the hole and measuring from that. Put the stake or stakes in before the plant so that you do not cause more damage to the roots by driving the stakes through them later. We have gone for one very strong stake and a flexible tie.
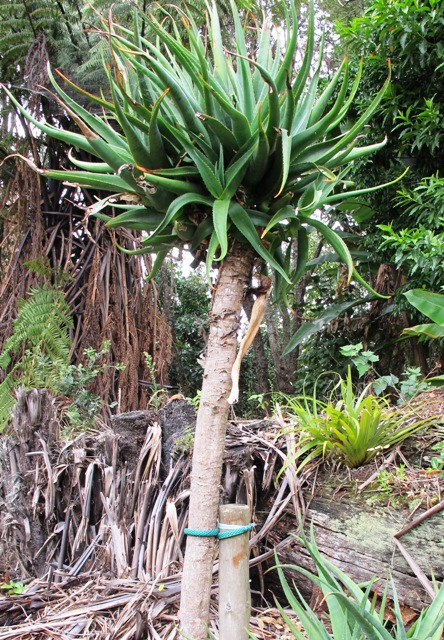 6) Two years later and the plant is recovering well although the foliage has yet to reach its former spread. It should now be safe to remove the stake.