
First written for Woman magazine and published on line only in January, on account of them ceasing publishing hard copies for distribution. A summary, really on our exploration and then creation of gardens that star in summer.

While we do exceptionally good spring gardens in Aotearoa New Zealand, the same cannot be said about our summer gardens. The best display I have seen was at Auckland Regional Botanic Gardens several years ago and that was large-scale amenity planting in a public garden. Domestic gardens are different.
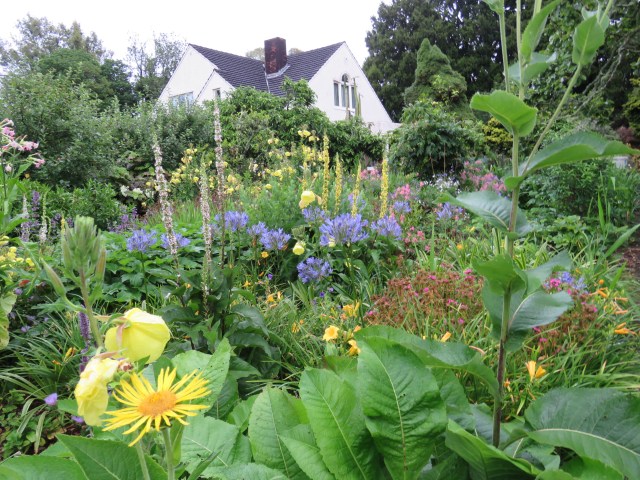
We looked around our own garden in summer and it seemed very green. We get summer rainfall so we are always green but we wanted flowers, a summery feeling. Hydrangeas and woodland were not doing that for us. When we closed the plant nursery on site, an expanse of flat, sunny area was freed up. It was a blank canvas and that is a rare thing in an established garden. Here was an opportunity to do something new and create an area dedicated to summer.
We set off on our first trip to reconnoitre summer gardens in the UK in 2009, with the idea of looking at gardens comparable to ours – in other words, large, private gardens managed predominantly by the owners on a comparatively small budget. And we wanted to have a look at Gertrude Jekyll’s legacy. To be honest, the Jekyll legacy looked a little dated in the hard light of 2009 and we were equally underwhelmed by the gardens recommended to us personally by a UK guidebook writer. We abandoned that plan halfway through and instead took in some of the high-profile, historic gardens – the likes of Hidcote, Hestercomb, Great Dixter and Sissinghurst.
On our next trip, we were better prepared. Tim Richardson’s book ‘The New English Garden’ had come out and that is an excellent resource in getting to understand modern directions. We knew we wanted to see the gardens of our era and we did. It was inspirational. We also discovered some of the contemporary garden designers whose work we found particularly interesting. By the time we made our third trip, we were starting to search out gardens by those particular designers, both private commissions and public projects.
Alas Covid forced the cancellation of our most recent foray so we may never get to see the wild flowers on the Pindos Mountains in Greece and the home gardens of some of the UK designers we were tracking. But we had learned a great deal.
Firstly, summer gardens are about herbaceous perennials grown in full sun. Like so many other NZ gardeners, we had largely treated perennials as the ground level filler to layer with trees and shrubs. Most of us do mixed plantings in this country – trees, shrubs, perennials and bulbs and, of these, perennials are often the afterthought. We needed to make them the stars and to do that, we had to learn how to grow them well and which ones would thrive here without becoming thugs or weeds.
Trees, shrubs and hedges might be used with perennial plantings to give height, form and stature, but sparingly, spaced widely, playing second fiddle.
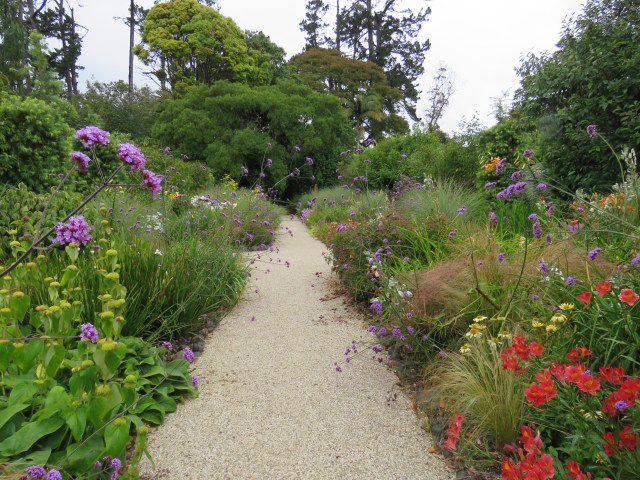
It was Tim Richardson, who gave us the concept of gardens that are immersive, not pictorial. The contemporary gardens we liked were wrap-around experiences where one is in the garden, not looking at the garden from strategically designed viewpoints. This is often achieved not only by leaving out vantage points entirely but also planting in bigger blocks, drifts or swathes to draw you through – a journey, if you like, not a static view.
Height matters. None of these modern gardens are carpeted in ankle-high to knee-high, tidy, little clumps like a modern take on Victorian bedding. Most are from waist height to towering above head-height so you really do feel immersed.
Nor did any of these gardens have neat little edging plants or clipped baby hedges at the front of the border, so favoured in this country by gardeners who feel it makes a garden look tidy and defined. What these edgers do is to create a demarcation line, a visual barrier which impedes the immersive experience.
Colour matters. Big, bright and bold, in the main, sometimes bordering on garish, certainly exuberant but always in controlled combinations of colour and texture.
Sustainability is key. The classic herbaceous twin borders have always been regarded as labour intensive with on-going staking, deadheading, weeding, digging and dividing. The New Perennials style of gardening has factored in the need to reduce labour input and much of that comes down to plant selection. Ideally, working with plants that don’t require individual staking and ongoing deadheading is one goal, as well as plants that don’t need to be lifted on a frequent basis. That said, I do a lot more deadheading now than I expected because too many plants will seed down and spread enthusiastically if I let them go to seed. Reducing weeding comes down to getting control of the weeds right from the start, allowing each plant to stand in its own space at ground level rather than intermeshing its root systems with its neighbours and keeping mulch topped up.
Dutch designer Piet Oudolf is a giant in the New Perennials movement. We loved the small private commission we saw of his at Bury Court but his recent work is more akin to grand scale amenity planting, getting – dare I say it – a bit utilitarian even. It is also very seasonal. We arrived a week too early to see his plantings at Pensthorpe Natural Park in Norfolk so all we saw was the promise of what was to come.
We found ourselves more drawn to the work of Dan Pearson, Tom Stuart-Smith, Nigel Dunnet, James Hitchmough and Christopher Bradley-Hole.
It is different in Aotearoa. We knew that. We expect our gardens to work a lot harder all year round. We also use a whole lot more evergreen plants; 99% of our natives are evergreen and most gardeners also lean more to evergreen exotics. We don’t make gardens that disappear below ground almost entirely in winter.
We also worked out that all the many plant lists put out to support these contemporary styles are of little relevance in our climate. They are tried and true performers in the northern hemisphere in places with colder winters, lower light levels and different soils. Some of their key plants just don’t like our temperate to sub-tropical climate, others become rampant thugs. We needed to work out which plants would thrive but be relatively undemanding in our conditions. Fortunately, Mark had been buying and acquiring perennials for years, planting them out and leaving them to their own devices to see how they responded, so we had some material to start with.
We created our summer gardens and goodness, concentrating on perennials gives a much faster result than working with trees and shrubs. By the second summer and autumn, they looked well furnished. And they work, to some extent, 52 weeks of the year, not just in peak summer. I admit we were working on a larger scale than most domestic gardens – around 2000 square metres of largely blank canvas – and with the advantage of a nursery background so we could raise most of the plant material ourselves.
If your lot in life is much, much smaller, it is a question of being more selective and scaling down the proportions but not the plants. Dwarf plants will never achieve the exuberance and generosity of this garden style.
What did we end up doing? A lot of looking, discussion, planning and marking out the space using tall bamboo stakes happened before any groundwork started, let along planting. You can reduce this time by employing a professional but that is not our way.
We planted five separate gardens with a sixth still under development. One key element was avoiding using the same plants in each garden; there is very little repetition beyond a few structural plants. If you keep repeating the same plants, it just ends up making the whole area look the same.
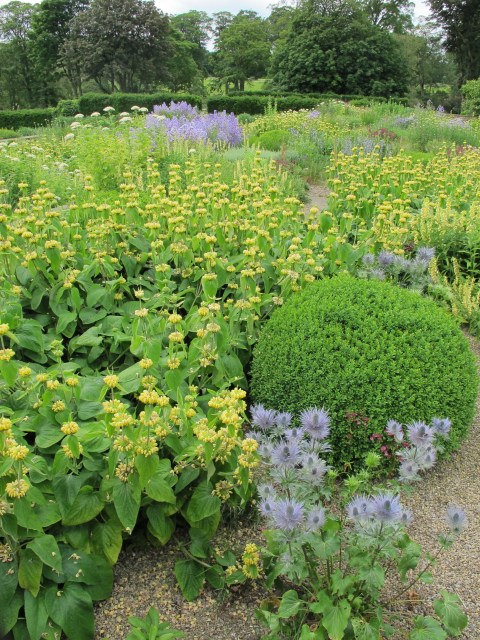

The Wave Garden drew inspiration from Tom Stuart-Smith in the definition achieved by undulating hedges giving form (we used little Camellia microphylla) with tall plants in the central enclosures and lower plants in the outside bays. It is the only colour-themed and block-planted garden we have, limited to blue and white.
The adjacent lily border is the only part of the garden dedicated to a single plant – OTT auratum lilies that Mark raised from seed. Thirty metres of them is a pretty astounding summer experience.
The twin borders have a distant debt to Dan Pearson. As I planted them, I kept muttering words like ‘rhythm’, ‘flow’ and ‘echo’. They are largely evergreen perennials and earn their keep visually from early spring through to very late autumn. We kept some unity by eliminating any plants that flower in pale to mid pink although cerise is fine. Red has been used sparingly.
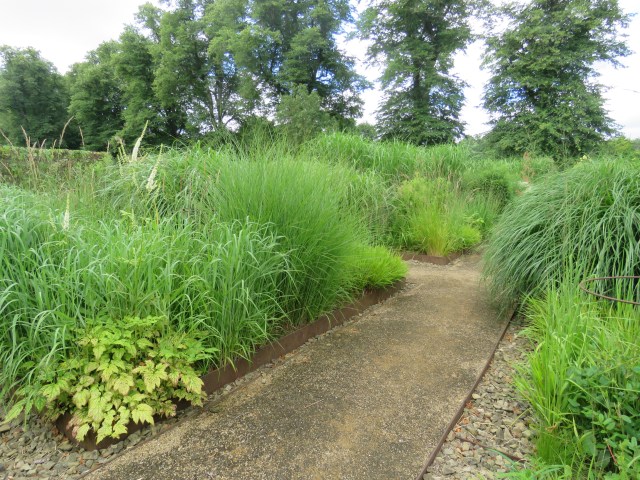

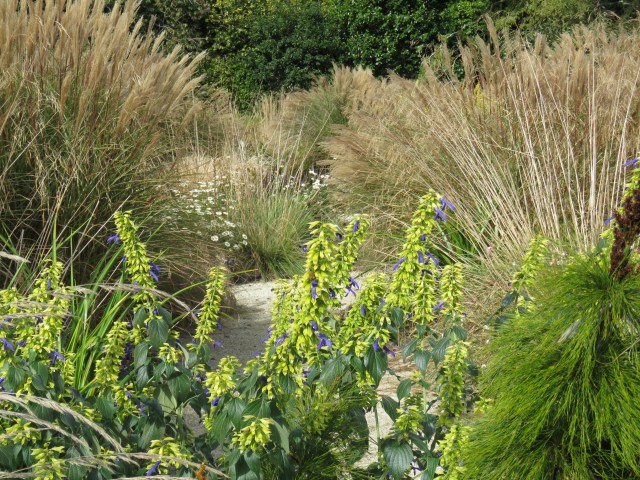
The Court Garden is the large centrepiece and was inspired by Christopher Bradley-Hole’s grass garden at Bury Court, although different in both design and plant selection. The focus is on big grasses and plants with grassy or spear-shaped foliage. By the end of summer, it is above my head in height and full of movement with just the gentlest breeze. I used a limited range of plants and over half of them are our larger native grasses, silver astelia and flaxes in burgundy and black so there is plenty to see all year round. It is a place for larger growing flowers too – apricot foxgloves, large salvias, a few single dahlias, tall helianthus, Inula magnifica and the like.
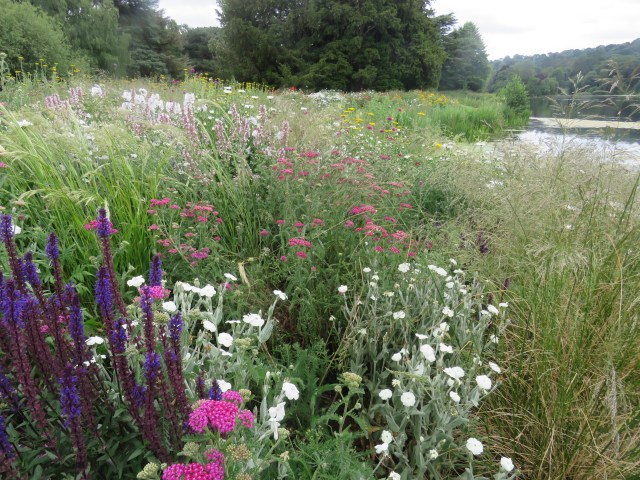
Finally the bee and butterfly garden owes a debt to Nigel Dunnett, particularly his magical perennial meadow at Trentham Gardens near Stoke-on-Trent. My mental image was of a perennial meadow but really it is halfway to a riotous cottage garden.
We have our summer gardens.
 Godwottery! A friend gave me

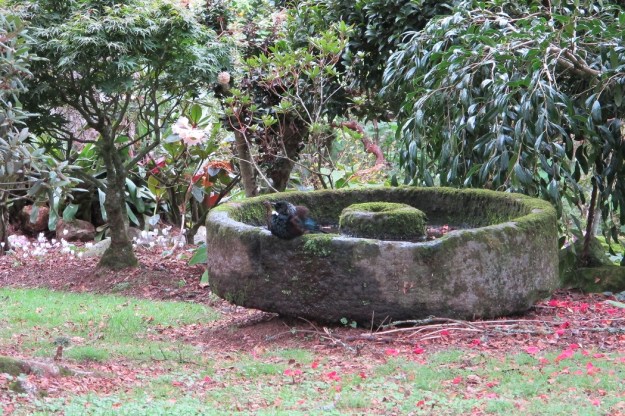
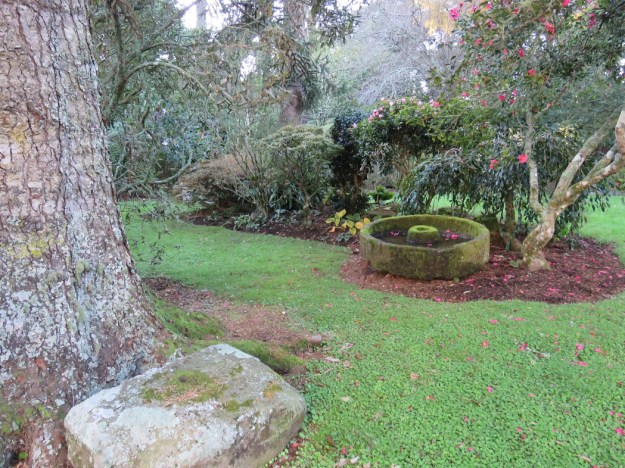
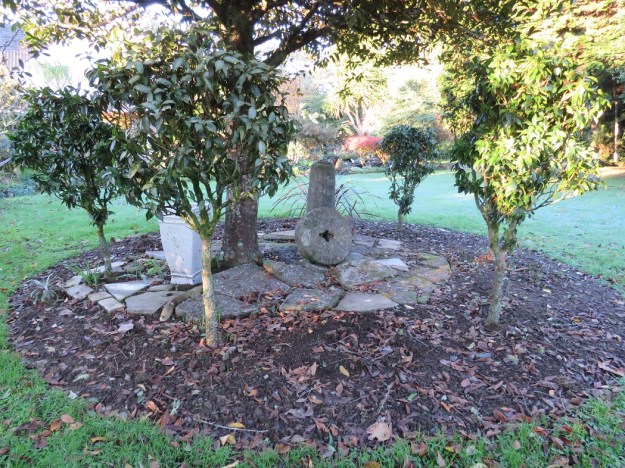
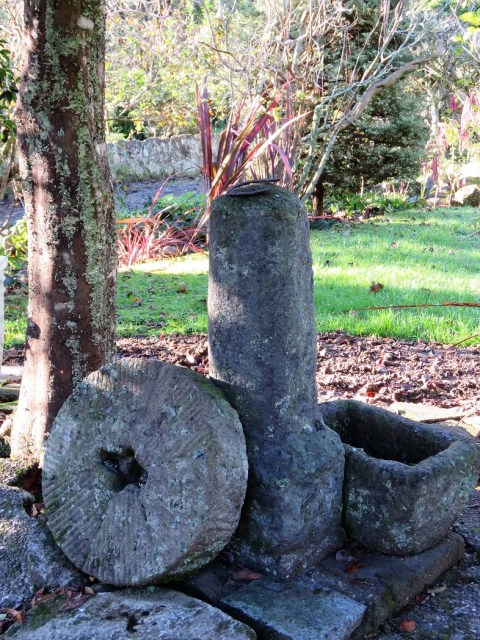
 One of the delights I appreciated at the Heroic Gardens Festival was this quiet, simple green space in the back garden owned by photographer, Gil Hanly.

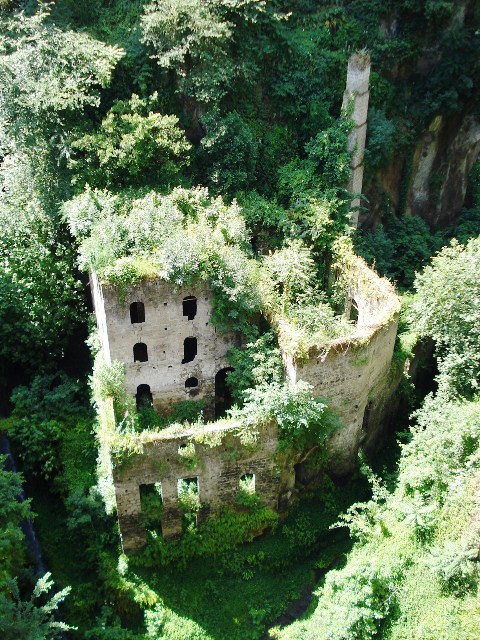 The little temple by the water (top) is, I am told, by artist, Bronwyn Cornish. For me it evoked the very old villa visible in a ravine in Sorrento in Italy (immediately above) which I photographed back in 2008. Anyone who has been to Sorrento (the jumping off point for Capri) will have seen this sight. In the Hanly back garden, the whole effect was understated but hugely effective.
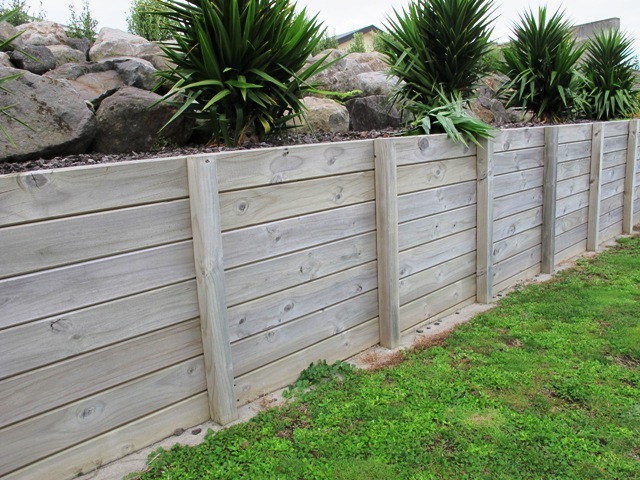 1) Timber remains the most common choice, probably based on price and the DIY ethos. It is holding back a considerable weight of soil that will be wet and exerting outward pressure, so strong construction is critical. Walk around established suburbs and you are sure to find older timber retaining walls bulging outwards. You need to get the supports right, both horizontally and vertically, to keep it all in place. Milled timber must be tanalised to ground retention grade or it will rot quickly.
 2) A cut stone wall is permanent, aesthetically pleasing and probably the most expensive option. The part-time stonemason here critiques my photos of modern stonework, pointing out that the stones should be keyed in to each other (as brickwork is). You should not be able to pick out vertical lines running down the wall because these are a point of weakness which indicate that it is the mortar holding the stones together. I mention this in case you decide to commission a stone wall of your own.
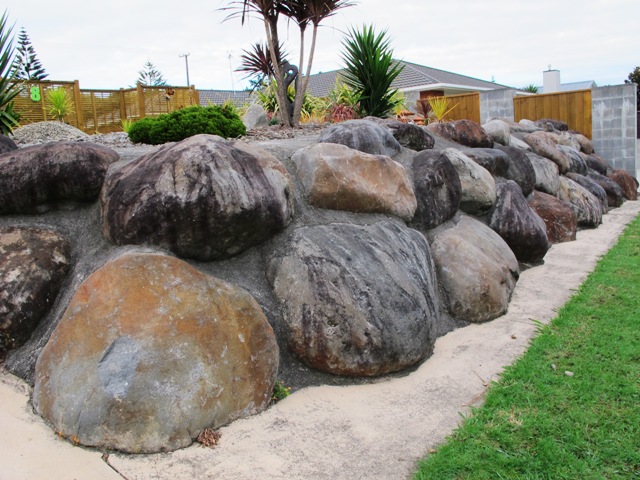 3) Immediately next door to the attractive stone wall is the DIY option – although probably involving some lifting machinery to get the rocks in place. These have cement laid between them, which is unlikely to be structural but merely to keep out weed growth. Keen gardeners might prefer to plant between the rocks. Interestingly, some gradient has been left here rather than the vertical cut seen on the adjacent stone wall. Allowing a gradient reduces the outward pressure the retained ground will exert.
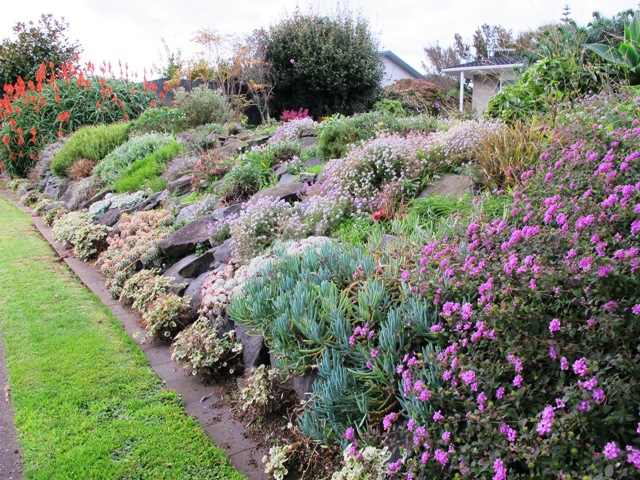 4) Further down the same street, I found the true DIY option. Smaller stones, able to be lifted by one or two people, have been placed and the area has been turned into a rockery on a sloped gradient again. Once established, plant roots will hold a certain amount of soil in place. The owner of this frontage is clearly a keen gardener.
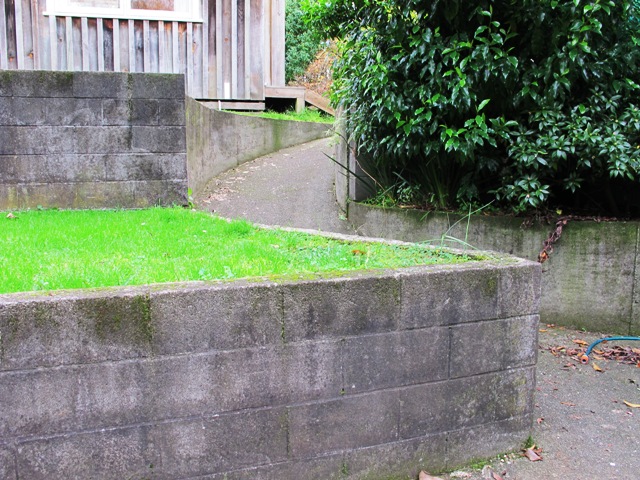 5) Ugly functionalism at its worst – and I can say that because this is on a property we bought. Concrete blocks have been used to retain the straight sections, poured concrete on the curves. It does the job. That is all there is to say. If I still lived in that house, I would be contemplating plastering and painting the retaining walls to try and make them a little less brutal.
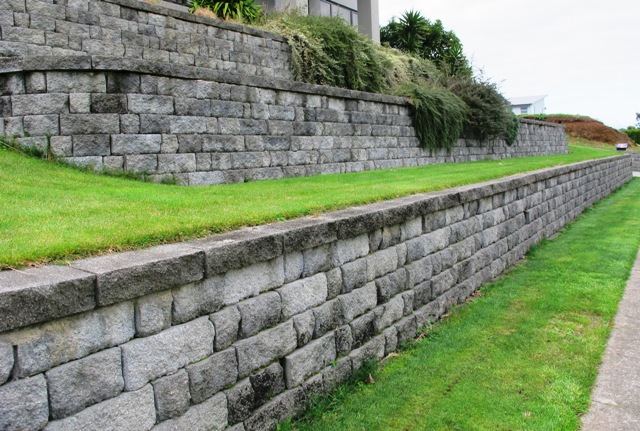 6) Faced with a similar situation to the preceding photo, this example shows what a little more thought, imagination and money can achieve. These are blocks – though whether a soft stone or aggregate, I am not sure – but a much superior look in aesthetic terms with the softer edges and random sizes. What also makes a big difference here is the flat capping on the top of the retained sections. It is a stylish finishing touch.
 7) The same bottom layer of retaining wall has been used throughout this modern subdivision. This house shows a mix of materials used in the quest for privacy, ground retention and street appeal. It was so well executed that I suspect a professional was employed to achieve this effect. The usual advice is not to mix materials but you can see the use of cobblestone bricks, timber, hedging and a relatively wide palette of plants. Prostrate plants are being used to retain the sloping bank.