Tag Archives: garden paths

Seamless transitions – doing away with garden edgings

Beth Chatto’s dry garden in the UK was a revelation for us and, to this day, we see it as a major influence in the whole shift of direction with the New Perennials or New Naturalism movement that is more commonly attributed to Piet Oudolf.

Beth Chatto’s dry garden

Beth Chatto was planting on an old riverbed in an extremely low rainfall area and she wanted a garden that did not rely on any irrigation at all. Clearly this bears no relationship to our conditions. We never irrigate because we don’t have to; we never suffer from low rainfall. But it is the absence of garden edgings I want to draw attention to.

I don’t for one minute think that they have to do as much maintenance on their perennials in these testing conditions in Beth Chatto’s garden. We would be digging through that mulch and bringing up the soil from below all year round.

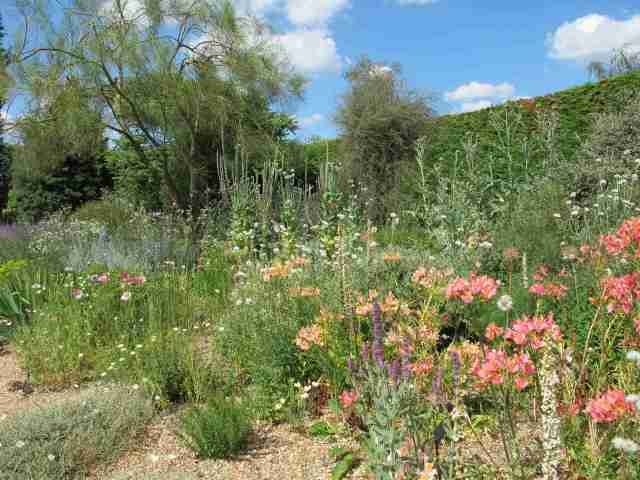
Garden edgings are basically about containing the garden and giving definition. To do away with them altogether completely changes the look and makes it far more natural in appearance – albeit while not being natural at all. I really like the look and debated about it when we were putting in the Court Garden but decided not to for practical reasons.

The Chatto garden again

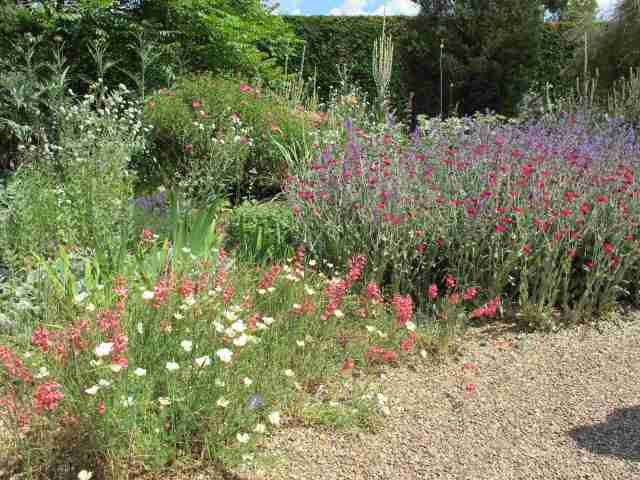
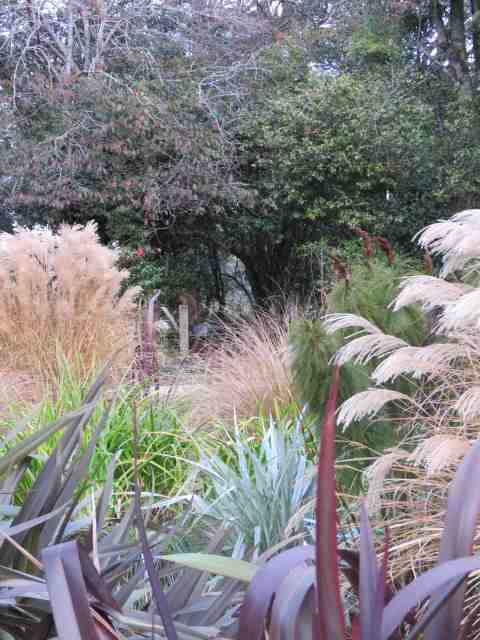
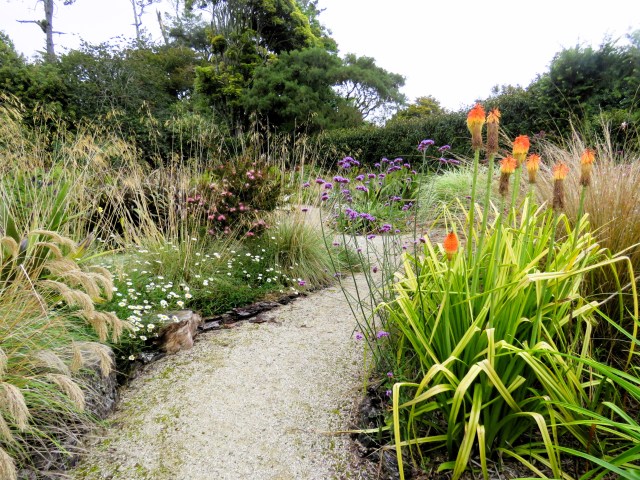
It came back to mind recently, firstly with the visit of Australian, Michael McCoy and then looking at some of Penny Zino’s photographs of her summer gardens in North Canterbury. I don’t have permission to use their photos here  but you can find them both on Facebook where they post photos able to be viewed by anyone or go to their own sites – https://www.flaxmeregarden.co.nz/gallery for Penny Zino and https://thegardenist.com.au/ for Michael McCoy. I am not an Instagram user but Michael is active on that forum too as @michaelmccoyongardens. If you browse their photos, you will find examples of these seamless transitions – paths meandering through plantings in the Chatto style and very charming it is, to my eyes at least.

We used a fine, cream coloured grit that compacts well throughout the summer gardens

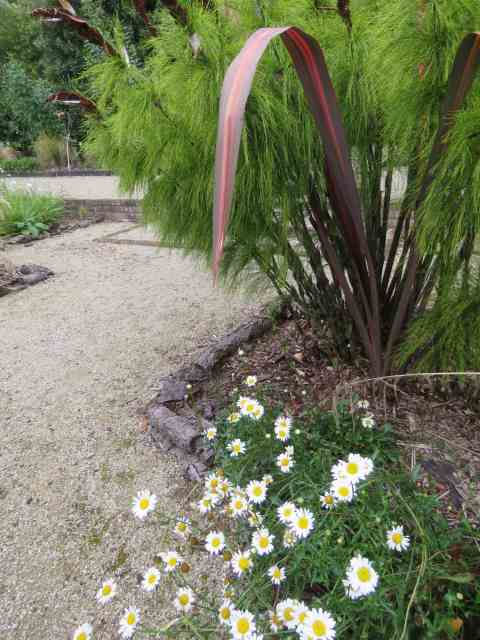
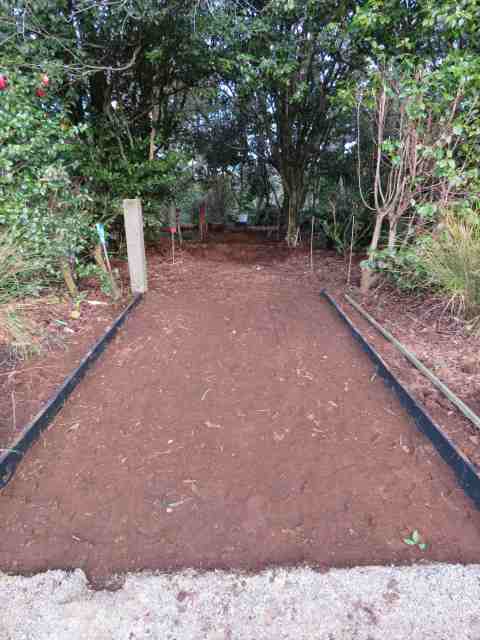
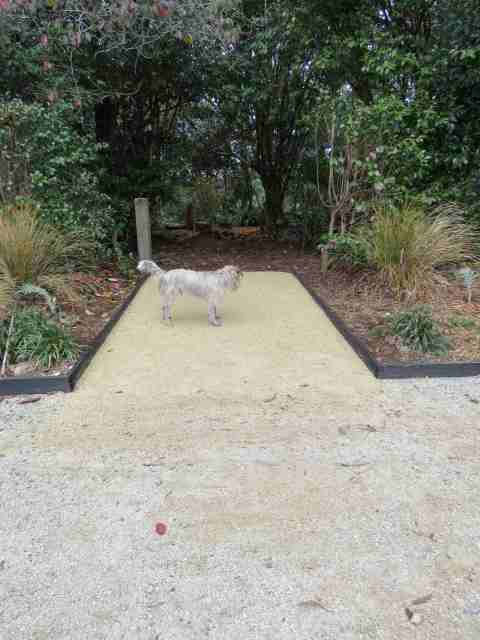
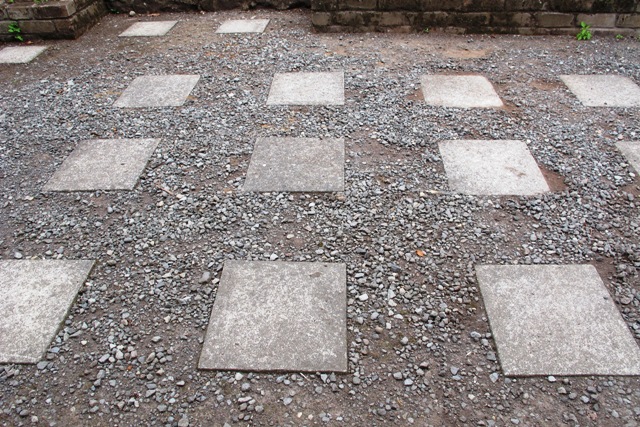
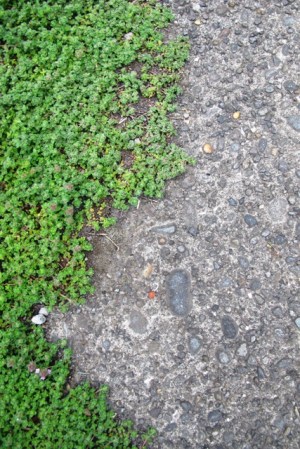
All of us appear to have chosen the same path surface in fine, cream grit and that, in itself, gives definition and lightness. Our grit is 50% crushed limestone and 50% crushed shell, bought from a local supplier of gravels and rocks. Beth Chatto used a mulch around the plants that is the same colour as the path grit but pebble-sized so it looks the same at first glance but it is in fact easier to rake to the side when digging is required. I didn’t notice that at the time but it is clear in my photo records. Not having seen their gardens except in photos, I don’t know whether Zino and McCoy have also carpeted their entire area in the same as mulch or whether they just allow the paths to peter out into leaf litter and soil as it goes further into the plantings.

I chose to go with an edging in the Court Garden for reasons that were entirely related to ease of maintenance but we chose an informal edge in lengths of pine bark from on site

It made me reflect on why it is not a practical option for us and why I decided against it. There are several reasons – climate, the presence of large trees, plant selection and maintenance. I think it is a dry garden technique and we are anything but. If the path surface extends through the garden as mulch, it looks best if there isn’t a whole lot of leaf litter and debris on the surface. With the number of large trees we have and being in a windy climate, we have falling leaves and debris all year round. Keeping the cream-coloured paths clear is a big enough job for us, without having to leaf rake or blow all the garden surface too.

Added to that, in our soft climate, we have rampant growth and managing perennials means constant cutting back, digging and dividing, restricting and deadheading to prevent too many self-sown seedlings. Plant selection becomes critical if you want that seamless look because every time you dig a plant, you disturb the mulch and make a mess. When set in cream grit mulch, it would be easier from the start to choose plants that grow from a central stem – lavender, euphorbias, roses, and salvias come to mind. Plants that form rosettes or spread beneath the ground – like perennial lobelias, alstromerias, asters, echinaceas, rudbeckias – all need regular attention to restrict spread or to keep healthy by dividing. I want to grow all these, too.

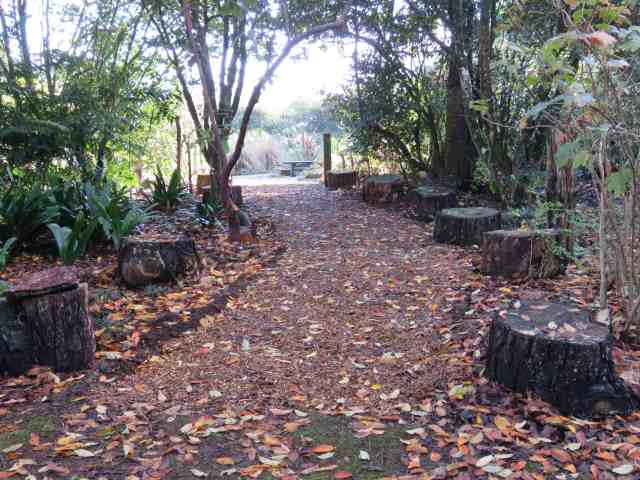
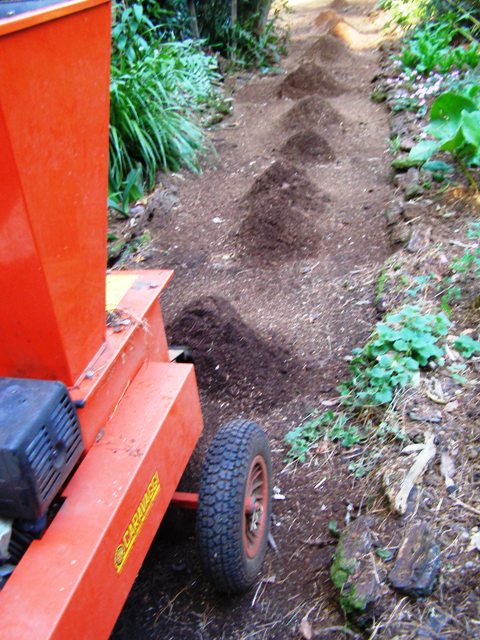
It is why we favour composted wood chip mulch. It is easy to top up at the end, cheap to use and, when weathered and composted, it just adds natural humus to the soil. It is best to source a woodchip that isn’t too coarse. Some mulching machines make a big chunky chip which takes much longer to weather and is not attractive to my eyes. Our friendly, local arborist (he lives up our road) provides a good grade of chip which soon becomes anonymous in appearance.  When I cut back or deadhead, I often snip the pieces to smaller sizes and leave them in situ to break down naturally. If I had decorative mulch, I couldn’t do that. 

Ralph tones in particularly well with the grassland

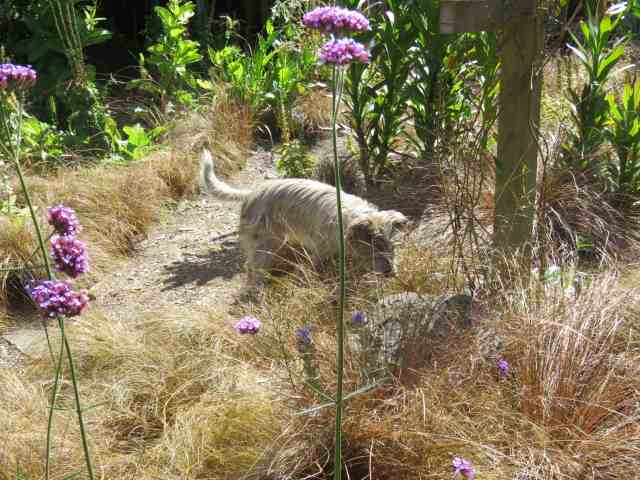
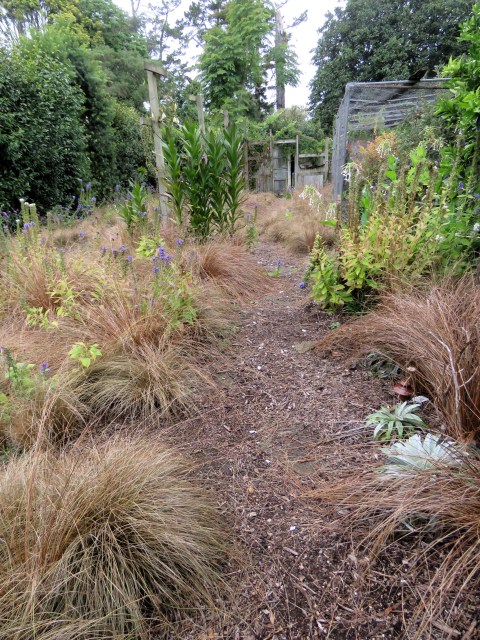
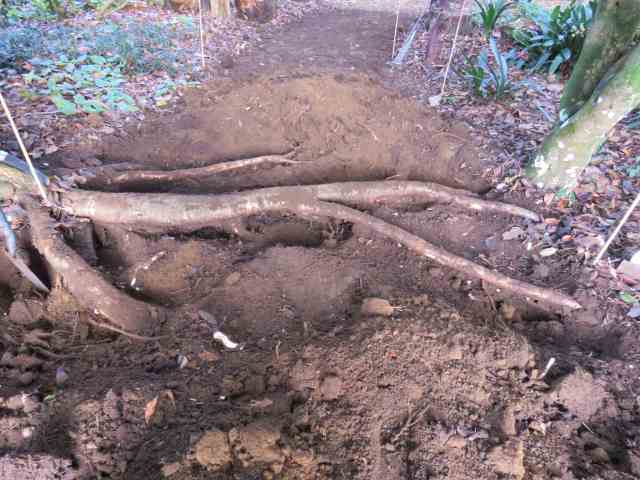
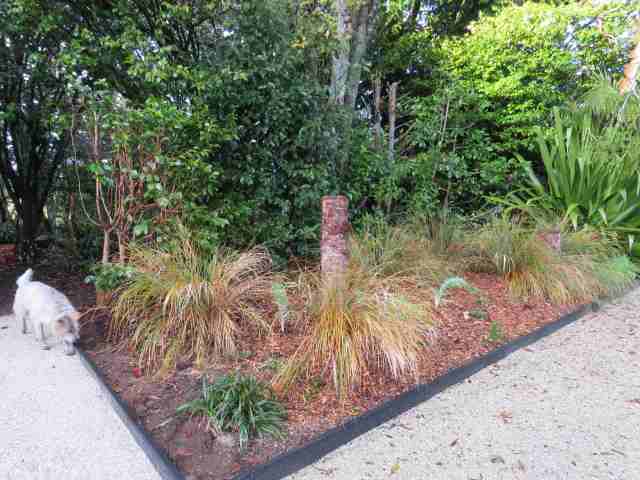
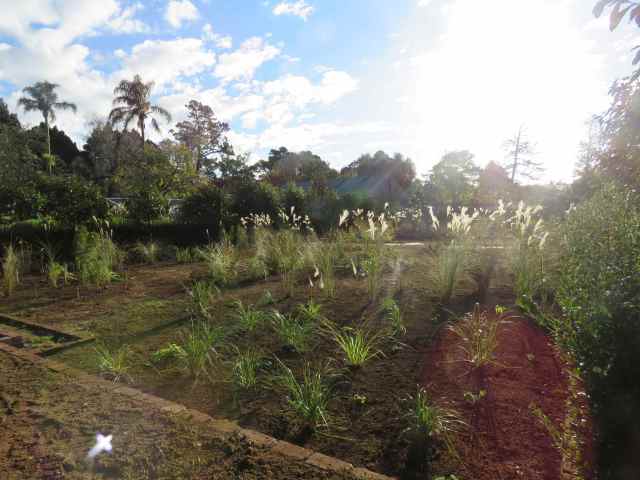
Our compromise was to go for that seamless look and meandering paths in the area we now loosely refer to as ‘the grassland’. It is a transitional filler space, primarily using just two native brown grasses, Carex buchananii and Carex coman’s ‘Bronze’ along with a fair swag of interlopers (‘volunteers’ as we call plants that just arrive of their own accord), residual survivors from its earlier uses and bulbs I have added for seasonal interest. So, a limited plant palette overall and most of the maintenance is pulling out seedlings (particularly of the carex) and a bit of occasional grooming of the grasses. It is not carpeted in cream grit but in woodchip – paths and mulch. It is a lower-key look that lacks the contrast and lightness given by the cream grit but it is a long-term, sustainable option in our conditions.

Seamless in woodchip

A pleasing project

Gardening here tends to come down to routine maintenance, emergency response (usually storm damage and fallen trees) and new projects. Projects are the most interesting but we have done all the large projects we planned so we are down to smaller ones now. It gives a break from routine maintenance which, by definition, is never-ending.

Opening up a new, main path to link the Avenue Gardens to the Summer Gardens

The latest project was getting the central path in to the Summer Gardens from the Avenue Gardens. It was always on the drawing board but sometimes it takes a bit longer to think through how best to achieve a good result. After three years of somewhat desultory thought, it was remarkably straightforward in the end. I was stuck on the idea that it had to be straight ahead, centred from the main Court Garden. The breakthrough came when Mark pointed out that while one end needed to be dead straight, where it came through to the avenues didn’t need to be. We could curve it so that the visual end-point was a large tree – a sterile Prunus campanulata, as it happens. That was the compromise that made sense to me.

Lloyd and Zach set about removing plants that were in the way. Digging out about five solid camellias to create an opening in the hedge was the biggest job although removing some rather large roots from another tree also took some muscle. Lloyd, being a man of precision, set about levelling the path, laying a base course for drainage and moving leftover cream-coloured limestone and shell gravel to match the path surfaces in the Summer Gardens. Where we transitioned to the woodland area, he spread coarse woodchip and we will let leaf litter build over it.

The line between the whitish gravel and the woodchip is a little stark at the moment, but otherwise, it all looks as if it has always been there and that is our goal – avoiding the look of something glaringly new in a well-established garden. The concrete post is still under debate. It is a relic from times past and Lloyd, who has already dug one out previously and therefore knows just how deeply those posts are bedded in the soil, has delegated this one to Zach, if we want it gone. I will wait and see if it annoys me over time.

A view shaft in creation was a nice surprise

I am delighted by the fact that there is now a view shaft from the Court Garden through to the Avenue Gardens – a leafy tunnel that leads to light from both directions.

Freshly replanted and in two sections now, the back border features gossamer grass and cardoons

The end border of the Summer Gardens was never a feature border, just a softening backdrop. When we prepared to reopen the garden in 2020, I wasn’t sure what to do with it so I bunged in a whole lot of yellow Wachendorfia thyrsiflora and a selected blue agapanthus. It was pretty enough for three years but never a permanent planting. They are now gone to compost. In a job that I thought would take me about a week but Zach accomplished in a day, (oh to be young and strong!) the border was stripped out and replanted so the dominant plants are now our native wind grass or gossamer grass,  Anemanthele lessoniana, and giant silver cardoons. Well, some of the cardoons are quite small because we were dividing the three I bought in last year, but they grew at an astonishing rate so I am hoping they all survive to be large this summer.

Planting in May, 2019. The white tassels are the flowers on miscanthus.

Then it was onto the Miscanthus ‘Morning Light’ in the Court Garden. When I planted this garden in 2019, I had drawn it all out on graph paper and thought I had the plant spacings right. I didn’t. We did one major thinning two years ago but still the miscanthus were getting too big and were planted without sufficient space between.

A senior staffer from one of the public gardens contacted me a few months ago to see if we had any spare miscanthus. He was struggling to find enough large plants to fill a big space. Why yes, we had plenty to share and it was a perfect solution. Because we had warning, Zach lifted and divided a few surplus plants from elsewhere, heeling them into the vegetable garden, ready for when we needed them.

Loading out the surplus miscanthus. Some of the clumps were so large, they needed at least two to lift.

This week a team of six descended upon the area and efficiently dug out all the large miscanthus and loaded them out. I think there were 33 large clumps and when I say large, I mean they could be chopped into at least four, some maybe eight to ten sizeable clumps to replant and still give instant impact this spring and summer. There should have been enough to furnish a large area.

The next day, Zach replanted the divisions he prepared earlier but at wider spacings and fewer in number. Job done for another few years and very painless it was, with many hands.

I think this was late afternoon light rather than morning light, but no less pretty for that.

What amazes me is that this plethora of Miscanthus ‘Morning Light’ all descend from just one small plant that Mark bought originally. It was still just one plant, albeit a large clump, when I first lifted it and started dividing it in 2017. We have just kept dividing since. In those six intervening years, that one original plant has now yielded several hundred sizeable clumps. Astonishing, really.

A pedestrian matter

The chequer board approach (in need of a gravel top up)

The chequer board approach (in need of a gravel top up)

This morning’s column is for readers on low budgets or in mature gardens. Path surfaces. If you are on a new property which has been landscaped, or what passes for landscaping, odds on your paths are in place and are concrete. We just love the utility and endurance of concrete in this country.

New concrete dries to a somewhat startling white which is usually appropriate to a new build, but can look garish and out of place on an older property. It also leaches lime for the first few years so you are likely to have trouble growing plants such as rhododendrons and camellias alongside it. The foliage will go yellow on acid loving plants.

Aged concrete softened at the edge with prostrate thyme

Aged concrete softened at the edge with prostrate thyme

Because we have a fair amount of old concrete here, where we have chosen to go with extending concreted areas or new paths, we take the trouble to mask the new look. Adding colouring (black oxide) counteracts the whiteness. Once it is all smooth and starting to start dry, we spray a sugar and water solution over the top. That strips the smooth top layer and exposes the aggregate. Voila. The concrete looks aged from the start.

Were we English, we would have a tradition of flag stones and stone pavers. We are not, so they are a very expensive option. You can get a similar effect in concrete pavers which come already roughed up and coloured to give the overall impression of stone. It’s a good product. We have used it to pave a small courtyard and the same style of pavers were used in a modern outdoor dining area I featured on this page a fortnight ago. The larger sized pavers look better if you want the flagstone look. Ours are 600mm square.

I don’t recommend brick unless you live in a dry climate. Old bricks are porous which means they soak up moisture and retain it, enabling moss to grow very nicely thank you. Brick paths tend to be extremely slippery for much of the year and therefore hazardous. It is also difficult to get a relatively even surface and if you don’t construct a solid edging, the side bricks roll out.

Gravel paths are usually best retained with a solid edging to reduce spilling. We have used concrete sidings on ours. We like gravel paths. There is something satisfying about the scrunch as you walk along them and they are softer on the eye than unforgiving concrete. They are not as simple to install as they first look, however. You can’t just pile gravel onto the ground because the mud will rise from below. You need to excavate down to lay a compacted base course first before you top with your choice of gravel. For foot traffic, a 5cm base should be fine. Don’t lay the top gravel so thickly that it makes walking difficult. You also need to choose your gravel with care. Rounded stones can be like walking on marbles but you want a grade which is reasonably consistent (in other words it has passed through a screen) to look attractive.

Gravel can be quite difficult to keep looking smart without a leaf blower. We did it for years with a leaf rake to remove the build up of litter but it is labour intensive and doesn’t do a particularly thorough job. The leaf blower removes humus in a trice and we wondered why it took us so long to discover its merits. However it is a noisy and intrusive machine and your neighbours will come to dread it as much as your lawnmower. A certain amount of gravel will get blown into the surrounds too.

If you have a larger area to cover, placing pavers at regular intervals throughout a gravel area can add interest and style cheaply. To look good, measure the placement of the pavers to keep them regular and put them down before you lay the top layer of gravel.

We have not gone with wooden walkways at all. In our garden, they would make us look too much like an institutional or public garden (“the DOC look” as we call it). Having seen them elsewhere, I would comment that even corrugated decking timber can get slippery if it is wet for protracted periods or in shade areas and it can be particularly hazardous on slopes. There are non slip products you can buy to secure to your wooden paths or steps but they will add to the cost. If you are not a public garden, then I think wooden walkways tend to be a better aesthetic fit to a modern house with acres of timber decking.

Mulching the leaf litter for the most pleasant walking surface of all

Mulching the leaf litter for the most pleasant walking surface of all

In woodland areas, we keep a thick layer of natural mulch on paths and we shun hard edgings because we want a natural look. In the last few years, when we groom up for our annual spring garden festival, we have gone a step further and raked up the all the litter and fed it through the mulcher. What comes out is a consistent grade of anonymous brown mulch which we then rake back over the paths. It gives the softest and springiest surface to walk on. While it doesn’t compact down, it is remarkably durable as long as it doesn’t get washed away and it can be maintained with a leaf rake. It looks really good until autumn when we get both wind and fresh leaf drop so it is not a long term solution but it gives an attractive option for wooded areas without expenditure.

Some level of consistency is desirable. No matter what size your garden is, you probably don’t want to be using a whole range of different path surfaces. They don’t all have to be the same and paths can differentiate between high use, formal and informal areas. But the overall effect will usually be more cohesive if you can keep some level of uniformity.

First published in the Waikato Times and reprinted here with their permission.