I meant to continue with Monty Don’s British Gardens series this week but I haven’t spent the time watching a second time to clarify my thoughts so that must wait. Instead, I channelled my former garden writer persona to capture a before and after as I pruned a camellia.
I was flattered when a gardening friend and camellia aficionado complimented us on our camellia pruning last year. I think his comment was along the lines of how much he notices and admires it every time he comes into the garden. It is not that we prune all our camellias by any manner of means and we do clip, shape, restrict or clean up in many different styles, depending on the role each plant plays in the garden. One size does not fit all.
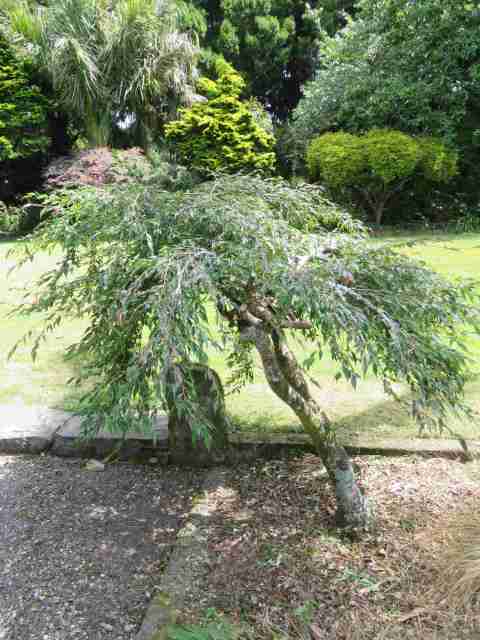
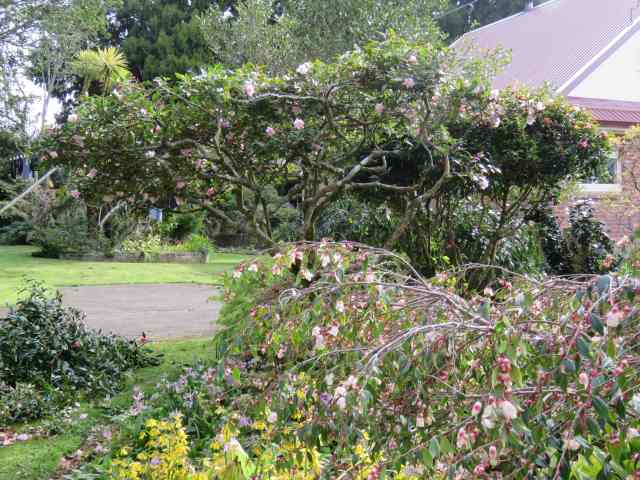
The before photo…
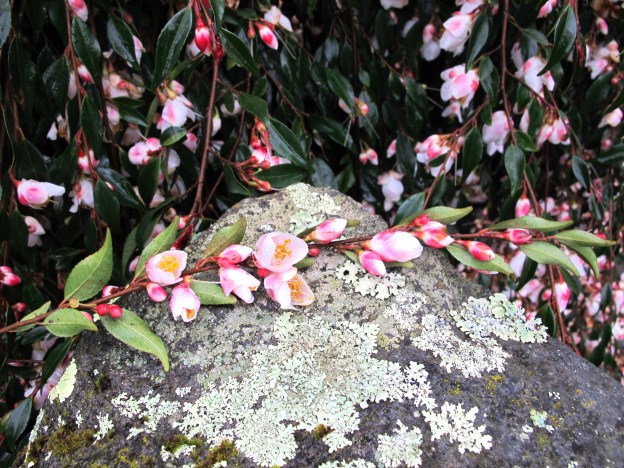
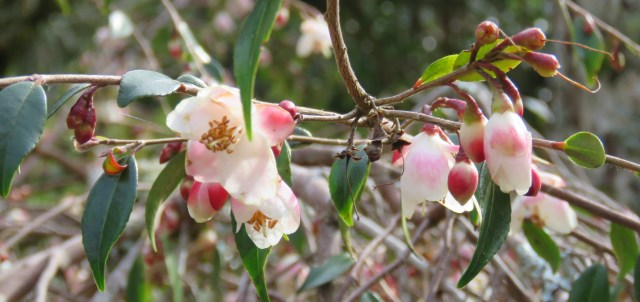
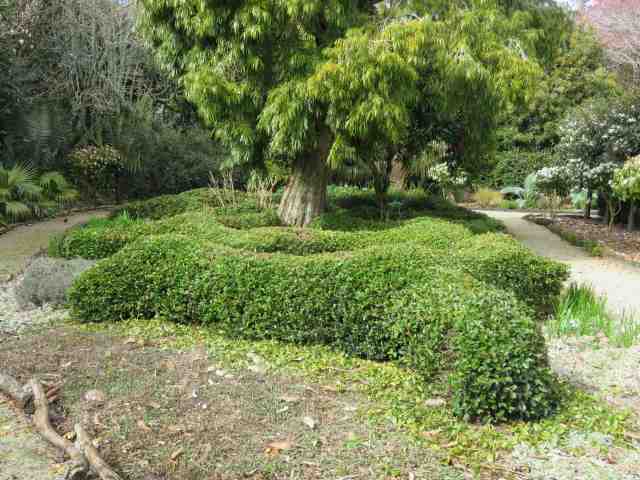
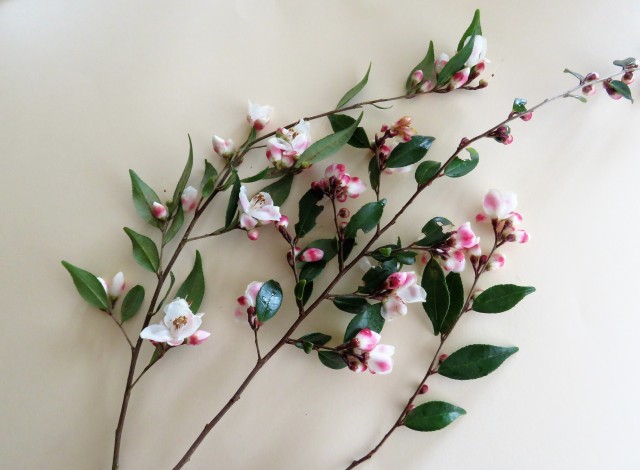
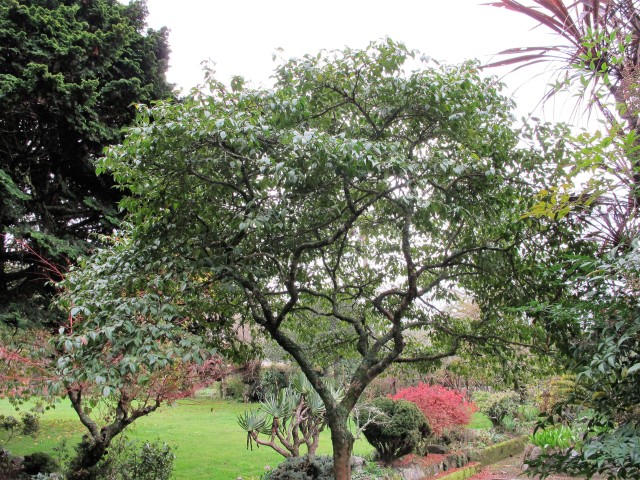
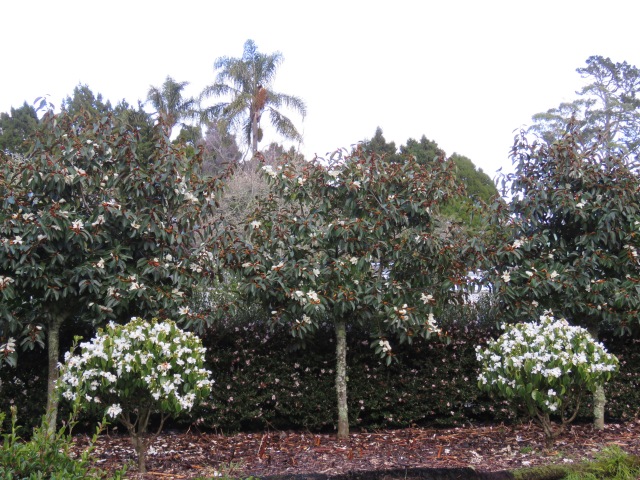
Camellia minutiflora is a dainty little species with the prettiest of tiny flowers and naturally arching growth which we like enough to have maybe half a dozen specimens through the garden. Normally, we try and prune in early to mid-spring but, as I cleaned up the border in which this one sits this week, I could not ignore that it needed some work done on it, albeit in the height of summer. In so doing, I cut a lot of flower buds off but it has so many that it doesn’t matter and the form is more important, really.
I started by taking off all the growths that were shooting straight up because we want to accentuate the arching growth. Second was pruning back the branches that were arching out too far; third was lifting and thinning from the bottom up. Finally, I thinned out what remained, tracing branches back to the trunk and checking how much bulk we would lose if I took off the whole branch. Always, I try to cut flush to the junction point and to make sure that the outermost cuts are, to all intents and purposes, invisible so no stumpy bits half way down the branches.
It used to take me ages to prune a plant like this but I am getting faster with practice and this was an hour from start to finish, using secateurs and a pruning saw. The pile in the wheelbarrow is well over half the plant in volume. Ralph supervised, as he does, but did not offer advice.
And voilà. The finished product. It is all about freezing this plant in size, finding its form and making it a shapely statement, rather than an unruly blob.
It is growing at an angle and we don’t mind that. It is perhaps a form of bonsai on steroids and in the garden rather than a pot. We want the plant to feature on its own, not to meld with its surroundings.
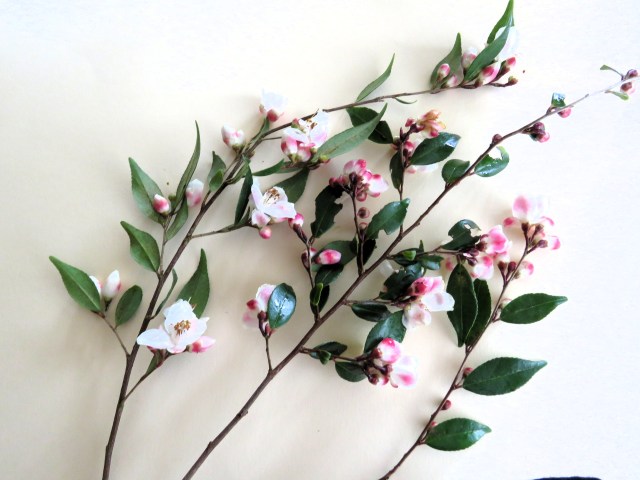
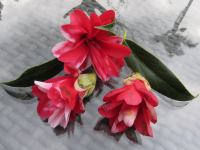
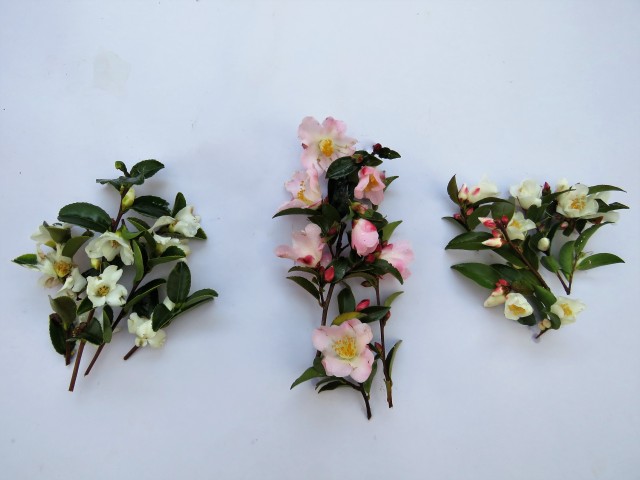
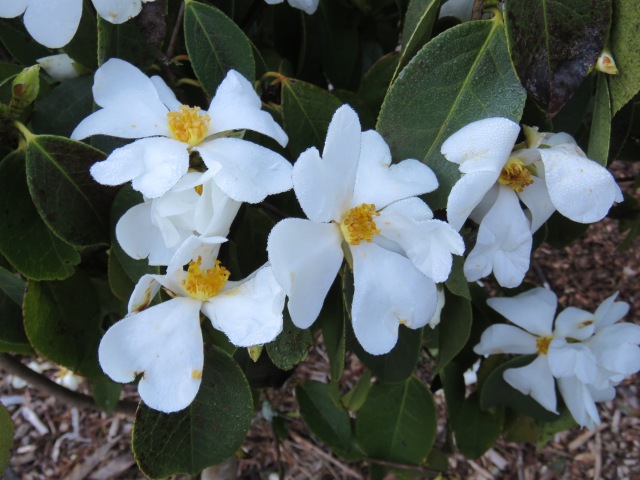
Camellia minutiflora – dainty, floriferous and characterful, in an understated sort of way
It is an experience shared by most gardeners. I will just get this (smallish) job done and then go on to something else. And that smallish job expands from a few hours to days or even weeks. So it is with trimming camellias, about which I wrote last week. I am still doing it.
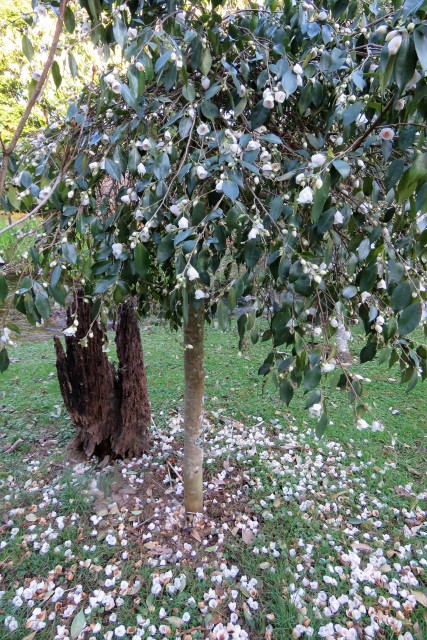
A rare sight these days – good flowers on Jury’s Pearl.
We don’t trim a lot of camellias, I thought to myself. And then I added them up. Excluding the camellia hedges – and there is a fair distance of those – I reached about 40 that get individual attention every year. That is not a lot compared to the number of camellias we have which must be several hundred, but it is still quite time consuming. Some we trim to be feature plants; some we trim to freeze them in size.
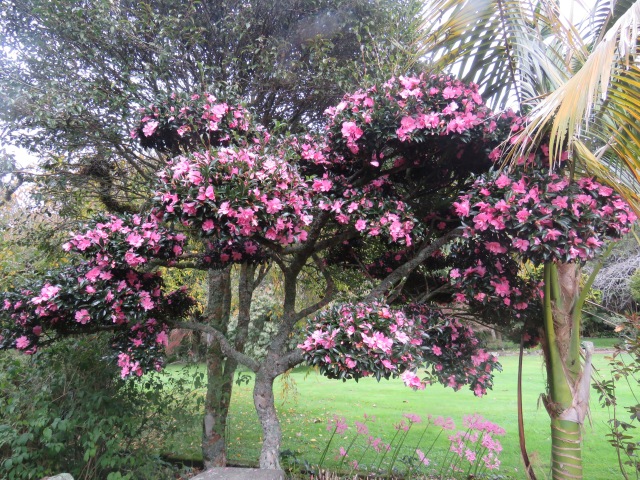
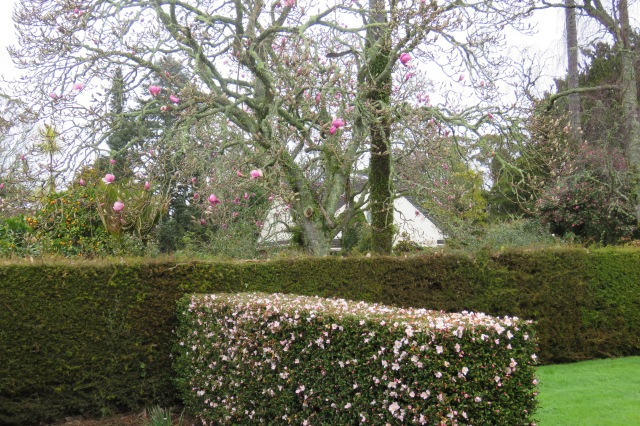
A relatively dry winter has meant we have had a better show this year. It doesn’t resemble the mass displays we used to get before the devastation wrought by camellia petal blight but there have been some pretty blooms. Most of our larger flowered camellias are retained as shelter, screening, wind breaks or their attractive form, certainly not for floral display because that is but a memory and the larger flowered types get hammered by petal blight. It means more work to ensure that in key spots in the garden, we have to make that attractive green form visually effective in order to justify keeping them. We have a strong preference for the small flowered varieties which do still put on a good show. And autumn flowering sasanquas, of course but they are long finished.
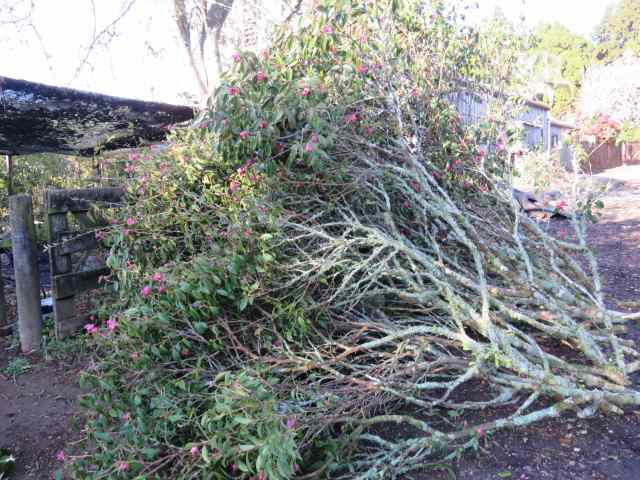
Fairy Wand has been reduced to a skeleton and we may drop it lower yet. We try and keep a good framework when we are cutting camellias very hard, not cutting off at ground level.
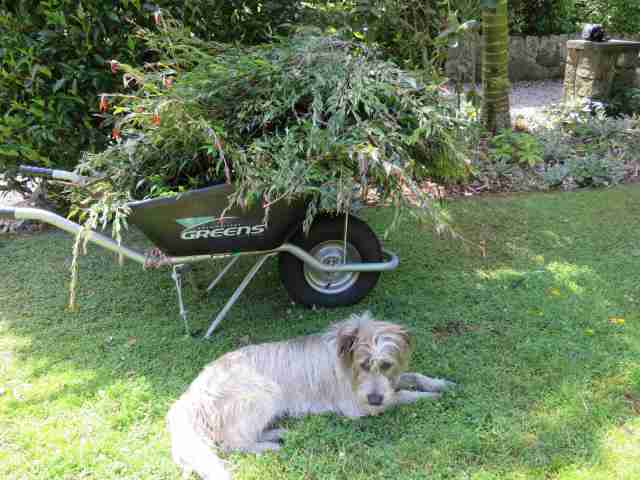
That is A LOT of Fairy Wand piled up to be mulched
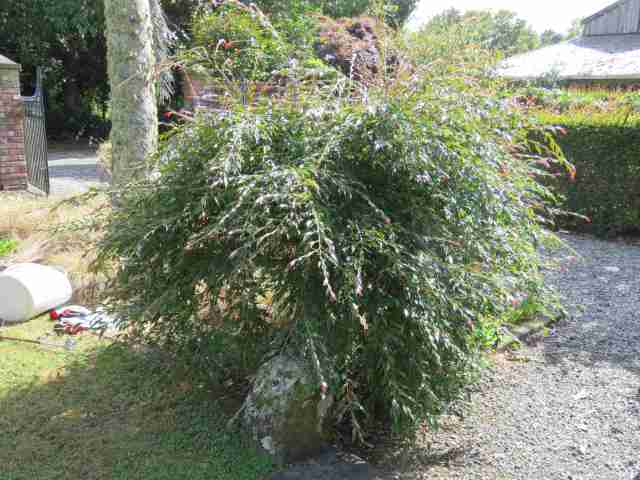
Camellia ‘Fairy Wand’ started life as a miniature back in the days when miniature only applied to the flower size and not, as most people assumed, growth habit. Bred by Os Blumhardt in Whangarei, Mark planted it, ‘Gay Baby’ and ‘Tiny Star’, also from the same breeder, beside our driveway. After about 40 years, they were all about six metres tall and in a decidedly leggy state, with wayward branches being cut off to keep the driveway clear. We stagger our extreme pruning here. ‘Tiny Star’ was cut back two years and is now a bushy little column shape about two metres tall. This week was ‘Fairy Wand’s’ turn for drastic treatment. ‘Gay Baby’ will be done at some stage in the next two years, when ‘Fairy Wand’ has rejuvenated. We don’t want a row of three massacred plants. It took Zach all of an hour to cut back the Fairy and about the same length of time for Lloyd to mulch it up for wood chip.
Taking Fairy Wand down behind gives this tableau of clipped camellias a whole lot more impact, especially the cloud-pruned sasanqua Elfin Rose. We are now thinking of dropping Fairy Wand behind even lower so it stays below the cloud pruning.
As an aside, it is possible to rejuvenate most michelias in the same manner. You do need to start with plants that are growing strongly because if they aren’t, the shock may kill them but we have, upon occasion, cut michelias as ruthlessly to promote bushy fresh growth.
Itty Bit in the centre after being reduced in size by about 40%
While Zach may only have taken an hour on ‘Fairy Wand’, I have spent many hours on others and that is because we want the form and shape on a healthy plant. I probably removed about 40% of ‘Itty Bit’ to reach this stage.
Camellia Hakuhan-kujaku – a shadow of its former self
It took me ages to get ‘Hakuhan-kujaku’, the peacock camellia, to this state. I took out at least 60% of it and it looks a whole lot better for the time spent. Shapely, not hacked or massacred.
Camellia minutiflora front right, Itty Bit behind
Little C. minutiflora is one of my absolute favourites, though hard to get photographs that do it justice so you will just have to take my word that it is a little charmer. It is a more recent planting so I probably only took 25% off it. At least it will only be a tidy-up trim for the next few years until there is so much congested growth and crossed branches that it is time to spend hours laboriously picking over every branch again.
My secateurs and pruning saw are my best friends at the moment. If you are wondering where to start on this type of pruning, I start by looking at the plant from every angle. Because we are trying to keep the plants from getting tall and leggy, I first take out growths on top that are going straight up instead of bushing out sideways. Then I work around the perimeter, reducing the spread, always trimming growth flush to the branch or trunk. Then I get into the middle and take out crossing branches. Finally, I get underneath and trim from below, making sure there is cover across the top while taking out surplus growths and branches below. I spend a lot of time looking and tracing where main branches go. This is why it takes time.
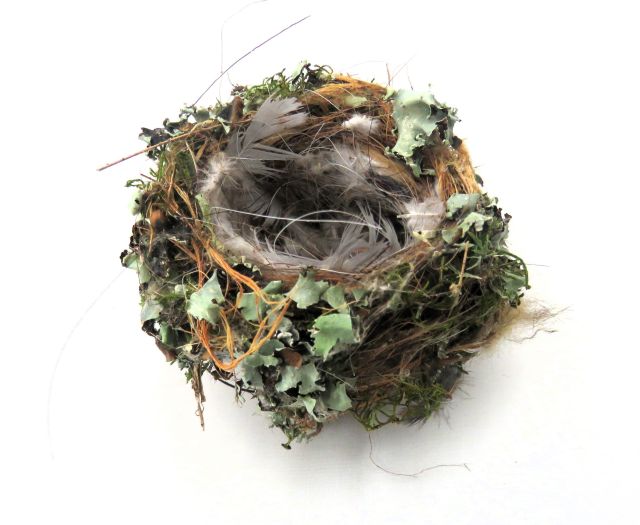
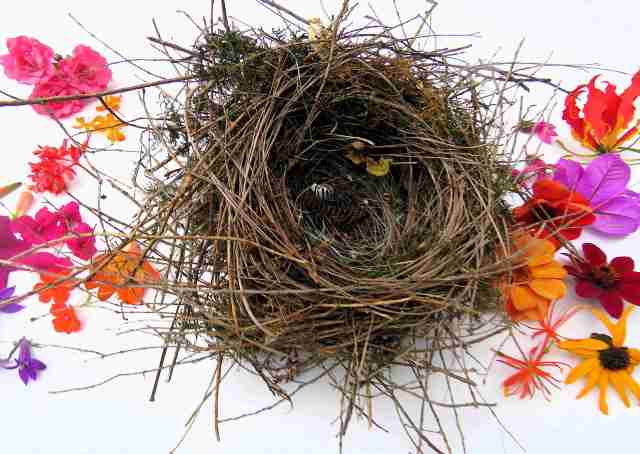
Look! Just look at this exquisite little chaffinch nest lined in soft feathers. Must the chaffinches start all over again because we humans destroyed their nest? Disclaimer – this one was blown down in a storm.
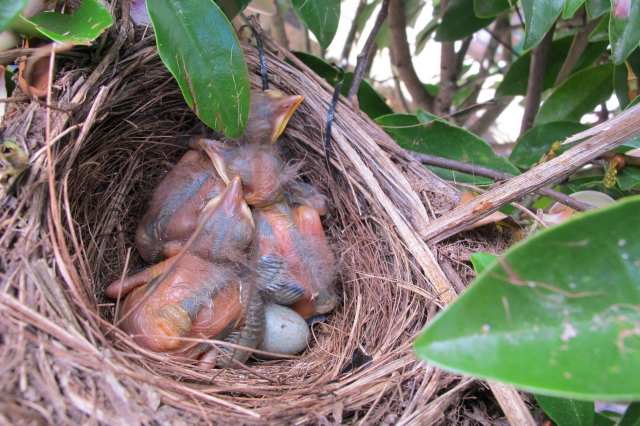
At this time of the year, I remember the warning from friend and colleague, Glyn Church. Pruning needs to be finished very soon on taller trees and shrubs. The birds are nest building and will be laying eggs. Unless you are okay with destroying days of hard work by individual birds and killing off their young, time is of the essence.
They are just common, pesky blackbirds but it still does not feel right to kill them for human convenience or by human carelessness. A tui nest.
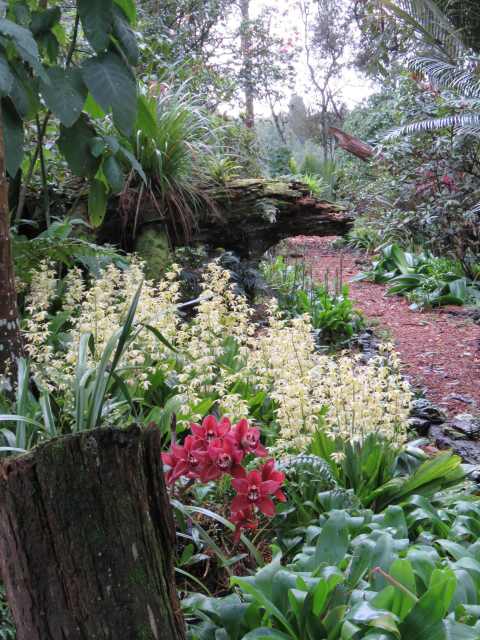
The Hippeastrum aulicums are coming into flower and the calanthe orchids are in full bloom.
As we hurtle into the full flush of spring, after a remarkably calm and mild winter, not only is the weather breaking up but I can feel the old sense of rising panic. The weather is entirely to be expected. Mark calls it ‘the magnolia storms’ on account of them always hitting during magnolia season – the confluence of cold fronts from the South Pole and warm fronts from Australia and the Pacific Ocean, I believe.
The sense of panic is more personal. I am the last of the generations who came through an education system where everything depended on the final examinations. There was no internal assessment. I was particularly good at exams which was just as well because I was never very diligent during the year. The arrival of spring meant I had to focus and cram in preparation, which I did. My last two years in school and then five years in tertiary education were marked by deep anxiety and stress in spring and exams generally finished towards the end. It was not my favourite season.
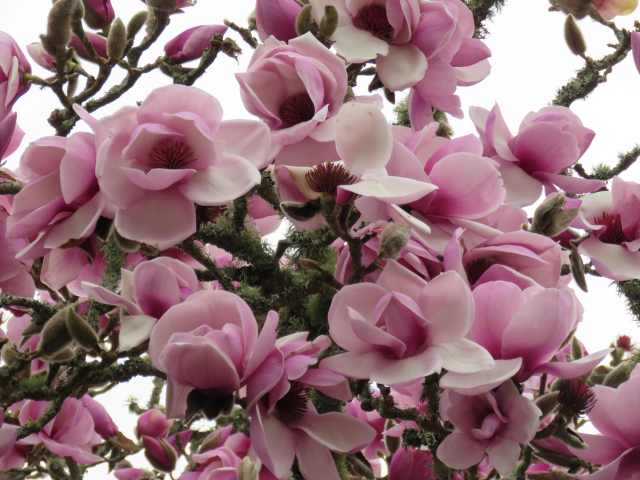
Some plants just get better with age and some do not. A magnolia should be amongst those that do get better and Magnolia Iolanthe fits that brief, even after 70 years.
I had barely recovered from repetitive stress dreams that dogged me well into mature adulthood when we inflicted springtime stress on ourselves in a different form. Many years of opening for the Taranaki Garden Festival meant that the advent of spring signalled the time the pressure came on to make sure every corner of the garden was up to opening standard. In a garden the size of ours, that was a big task that took planning, personal deadlines and a lot of hard work that wasn’t always fun.
The exams are a very long way in the past and we no longer open for the garden festival. Any stress these days is entirely self-inflicted but I still felt the old anxiety rising as I walked around the garden this week. The onset of spring has been so rapid this year, that I found myself worrying that if I was distracted or forgot to look for a few days, I could miss something entirely. I had to speak sternly to myself, pointing out that this is what we garden for and that I need to take the time to breathe, to look and to enjoy. I listened to my own advice and truly, the seasonal sights are a joy to experience and yes, I do have the time these days to appreciate them. Every day, another plant will open in bloom to add to the floral tapestry already on display.
I have almost finished pruning the camellias that need it and I pondered the thought that two skills which are under-rated in gardening are pruning and staking. It is awfully obvious when they are done badly and doing them well can seem to take quite a bit of time.
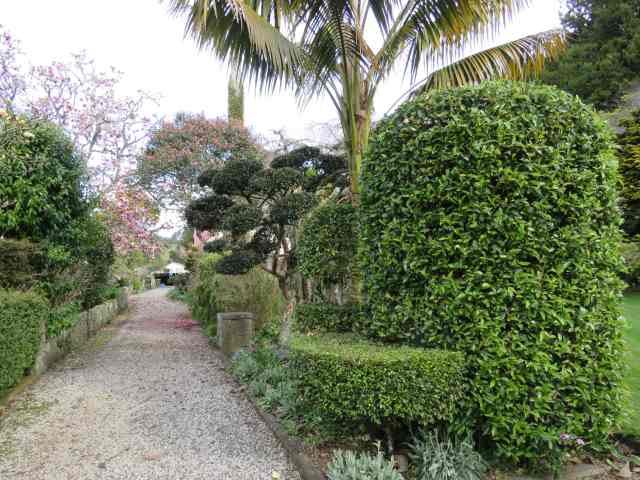
The undulating hedge in the Wave Garden – cut with an electric hedge trimmer.
We use a variety of pruning techniques on the camellias, depending on the situation. If we are doing a full rejuvenation, it is easy. We just cut off to a good framework and then practise patience for two years while the plant recovers and makes bushy, fresh growth. Camellia hedges are done with the electric hedge trimmer. Mark did the Wave Garden hedges and I spent probably as long going through afterwards with secateurs to tidy up wayward branches and bits that were still out of place.
Camellia Tiny Star was cut back pretty much to bare wood two years ago after getting way too tall and leggy. This is two years of regrowth.
It was the four umbrella camellias surrounding the sunken garden that have taken the most time. These are top-worked, so grafted about a metre off the ground. They are a seedling from Mark’s breeding programme that we never sold but Mark has always referred to as Pink Poppet. For years, he has kept them in shape with the hedge clippers. When I say years, I have no idea how long. Maybe fifteen or so? They had become very dense and full of debris and dead twigs. I decided they needed a good clean out and thinning.
Untouched as yet.
Spot the difference? These are two down the other end of the sunken garden that have just had hours of attention and you can see in the wool bale how much has been removed.
I may not have started, had I realised how long it would take. The first one took me around four hours. I did speed up but even so the last one would have been two and a half hours and I could have spent longer and done a more thorough job. At the end of it, I had removed at least a third of the bulk and they did not look any different. But that is the whole point and the reason why it took so long. I didn’t want them to look any different, I wanted them to be able to breathe, to shed spent blooms and leaves and to get rid of the growing issue with black mould on some of the foliage. Invisible pruning. I am hoping they may last another decade.
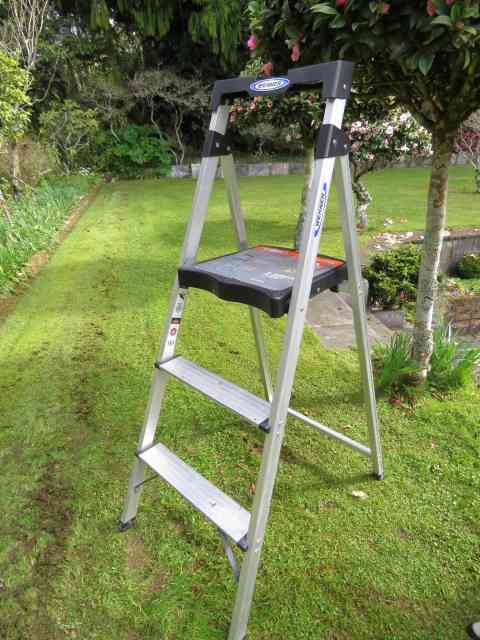
Behold my ladder. In an establishment with many ladders (about eight different ones), this one is mine, all mine. I bought it to use in the house. We have a higher ceiling stud than modern houses and I couldn’t reach the top cupboards from the kitchen step ladder. So it lives in the broom cupboard in the house but I also use it in the garden. It is so lightweight, I can lift it with a single finger. It is very stable with a platform for comfortable standing, rather than a narrow step at the top. There is even a handy top shelf for small tools. I can’t recommend it highly enough for anyone who needs a convenient ladder for outdoor or indoor use. Lloyd was so impressed when I let him use it indoors for a task that he said he was going to get one for his home. For New Zealand readers, I bought it at Mitre 10 Mega and it wasn’t hugely expensive – a bit over $100, from memory. It is worth every cent.
This is a longer piece than I usually post on this site but it was written for and first published by the Royal Horticultural Society (UK) annual journal of the Rhododendron, Camellia and Magnolia Group, 2022.
C. sasanqua ‘Crimson King’ showing the typical open, graceful form many sasanquas have as they mature
I married into a camellia family. Both Les Jury and Felix Jury were recognised in their day as making significant contributions to the camellia world with their new cultivars. Both worked with Camellia japonica and hybrids to create plants that were self-grooming (dropping spent flowers rather than having them hang onto the bush) and breeding out the tendency for stamens to turn black as blooms aged. Hugely popular in New Zealand, camellias ranked second only to roses in sales figures.
My own mother was not as keen. True, she described a young plant of Felix’s C. x williamsii ‘Rose Bouquet’ as being like growing an herbaceous paeony in a climate which did not favour the growing of any paeonies at all, but it was clear she saw it as second best. Memorably, she once declared that the trouble with camellias was that they were all red, white or pink blobs with shiny green foliage. With more experience, I now realise she was only thinking of C. japonica and hybrid camellias. I do not think she ever met the species or had anything to do with C. sasanqua.
We have a large garden with many camellias used in a variety of situations. I have never counted them but it will be in the hundreds, not the tens. When Mark started plant breeding, he followed in the footsteps of his father and his uncle and chose camellias first. They are right at home in our climate so we have camellias as feature plants, background plants, hedges both informal and clipped, windbreaks and as a backbone plant repeated throughout the garden.
The unsightly appearance of petal blight on japonicas, reticulatas and many hybrids. It looks marginally better on red blooms but a great deal worse on pale and white blooms.
The arrival of camellia petal blight – Ciborinia camelliae – was nothing short of devastating. Our massed displays of C. reticulata, C. japonica and hybrids blooming in winter and spring disappeared as petal blight took hold and now they are just a memory. Petal blight is common throughout the world. Is it only Australia that remains free from it now? It took a trip to the International Camellia Convention in southern China in 2016 for us to realise that our particular climatic conditions mean that the impact of blight here is arguably at the very worst end of the scale. We are humid and mild with regular rainfall and plenty of wind to spread the spores far and wide – ideal conditions for any fungal ailment. In the drier conditions of China, it was nowhere near as big a problem as here and talking to growers from around the world, they don’t suffer the same level of impact as we do.
In our particular location, it is bad enough for me to say that we haven’t and wouldn’t plant a C.japonica, a large flowered hybrid or a C. reticulata now. There is no point. Flowering has become sparse and all that early breeding for plants which are self-grooming does not work for these vulnerable camellias so the display is now pale brown blighted blooms or blooms in the process of being blighted with just a few lovely flowers to remind us of times past.
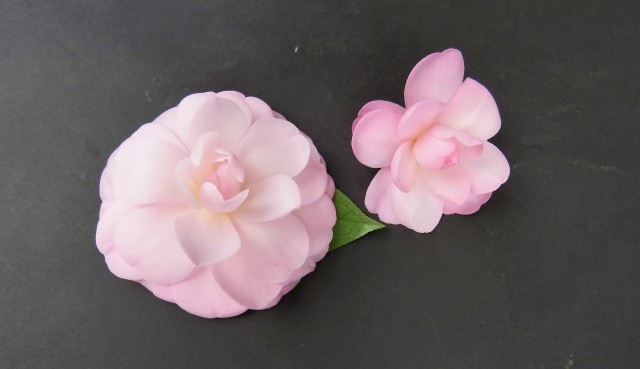
Camellia minutiflora
All is not lost, but we have done a serious re-think. Fortunately, Mark had always been interested in miniature flowered camellias with a strong personal preference for the simplicity of singles and semi doubles. They mass flower and each bloom only lasts a couple of days so they fall before blight takes hold. We also like the species and had already set out to build a collection of most that are available in this country. Some of the species bring in a wider range of growth habits and foliage than are seen in commercial camellias. In fact, some don’t even look like camellias as most people know them. We are so besotted with little C. minutiflora that we have several in the garden; what came to us as C. puniceiflora doesn’t look like a camellia at all and only aficionados would identify the pink flowered form of C. sinensis and the assorted yellow species we have as camellias.
The dainty flowers of C. minutiflora
We also have a good representation of autumn flowering varieties from the C. sasanqua group, which are not affected by the blight. In the days when the large flowered C. japonica were favoured, with a particular preference for the perfection of formal doubles like ‘Dreamboat’ and scores of others, the attitude to C. sasanqua was bit dismissive. They lack the solid petal texture and defined form in their blooms and are slower to establish, as nursery plants at least. In New Zealand, they were largely seen as utility hedging, best in white and even better if C. sasanqua ‘Setsugekka’. The white ‘Setsugekka’ hedge became a cliché.
Tastes can change. Now we appreciate the C. sasanqua cultivars for their mass display in autumn through to early winter, preferring that looser flower structure and simplicity. Added to that, as mature plants, most have a naturally graceful form that is easy to tidy up and enhance to create a feature plant even when not in bloom. Shapes are important all year round and shapes with good, healthy foliage that are also hardy, reliable and low maintenance are not to be disdained.
We give a lot more thought to our camellia plants these days. Many are invaluable for shelter and wind breaks. Flowers are a bonus. But not every camellia plant is valuable. If they are not flowering at all well, are not pleasing to the eye as a shrub and are not filling a useful purpose, we have no qualms about removing them. These plants used to at least fulfil one of those functions – that of mass flowering.
Lifting and limbing – finding the natural shape of a plant and highlighting it – Camellia ‘Tiny Princess’
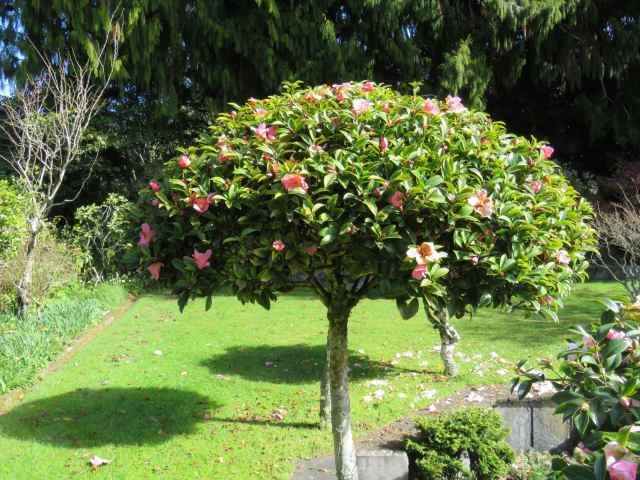
Camellia ‘Dreamboat’
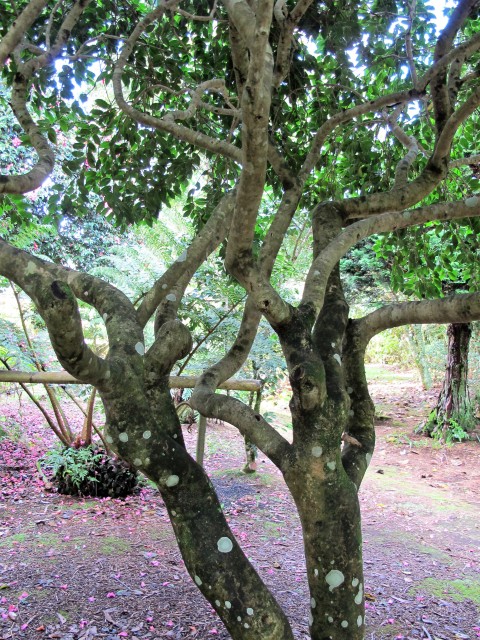
We do a lot of what we call lifting and limbing here. In a mature garden, raising the canopy and letting light in is ongoing. What sets lifting and limbing apart from simple pruning is that it is more focused on making the most of the natural shape of the mature plant. Mark is the master of this but my skills are improving. More time is spent standing and looking, then tracing where branches go than actually cutting and there is much going up and down the ladder. It is very satisfying to find the most pleasing forms within a plant and to highlight the shape by removing extraneous growth. Added to that, it is a one-off activity that just needs a bit of occasional maintenance in future years. It is possible to remove a lot without a plant looking massacred, as long as clean cuts close to the trunk or branch are made.
Cloud pruned ‘Mine-no-Yuki’
Our garden is very light on ornamentation. We don’t go in for sculptures, statuary, pots or a plethora of trellises and archways, preferring to use key plants as focal points, along with natural vistas. Mark’s cloud-pruned camellias are particularly fetching. He started on Camellia sasanqua ‘Mine-no-Yuki’ which was so huge that its weeping growth was blocking a pathway. The initial shaping took him several days up and down the ladder which was hard on his knees. He must have removed well over half the jumbled plant but found the most pleasing shape beneath. We keep it clipped to flat- topped cloud shapes. It only needs trimming once a year to maintain that form and that is a simple job that takes a couple of hours with hedge clippers. ‘Mine-no-Yuki’ is not good in bloom here. We get a few days of pristine white blooms before they get weather damaged; from then on we get a display of brown and white flowers. As a clipped, evergreen shrub it makes a splendid feature all year round.
I differentiate between clipping and pruning. Pruning is done with a pruning saw and secateurs; clipping is carried out with trimmers, be they hand-held hedge clippers or motorised trimming blades. Good pruning is a higher grade skill because the aim is to get into the plant and shape it without the work being visible – ‘blind pruning’, an older colleague used to call it. Hacking is bad pruning.
Left to right: ‘Elfin Rose’, C. puniceiflora, C. trichoclada and C. gauchowensis. All are clipped once a year.
We don’t clip many plants – ours is not a garden modelled on the clipped and corseted Italian genre – but we have a few that we like to use as punctuation points in the garden. Inside our entrance, we have a small grouping of camellias that we clip tightly once a year. The shape of each has been entirely determined by following their natural growth habit and exaggerating that. So C. gauchowensis is a plump, rounded pillar, C. puniceiflora a three tier cake stand and the somewhat insignificant C. trichoclada is a flat plinth. They are backed by the cloud pruned C. x hiemalis ‘Elfin Rose’.
Cloud pruned ‘Elfin Rose’
The problem with clipping is that it cuts every single outside leaf that then turns brown on the cut edge. This does not matter when the clipping is being done on plants with very small leaves and it is not generally a problem on the C. sasanqua cultivars which have a somewhat softer leaf. It matters a great deal if the clipping candidate has the tough, shiny, leathery leaves common to the C. japonica types. I drive past a clipped white C. japonica hedge from time to time and it simply looks awful when it has been freshly cut. I wonder if the owners went to buy the aforementioned ‘Setsugekka’ (which would have been much more successful) but the garden centre had sold out so they talked them into a white japonica instead? It was not a good choice. Keep your clippers away from C. japonica varieties is my advice; reach for secateurs instead and forget any ideas of tight-clipped shapes.
Our preferred hedging options. Left to right: C. microphylla, ‘Fairy Blush’and C. transnokoensis
We have camellia hedges ourselves but all are small leafed varieties that clip tightly to make a dense barrier over time, looking sharp-edged and smart. We also select for small single flowers that drop cleanly and break down quickly, thereby avoiding the brown sludge that large, heavy textured flowers can create when they fall. The three camellias we have used for hedging are ‘Fairy Blush’, C. transnokoenis and C. microphylla. ‘Fairy Blush’ is our first choice where we want dense hedges to around 1.5 or 1.8 metres high. It is a C. lutchuensis hybrid, the first camellia Mark ever named and the one that remains our all-time favourite with its exceptionally long flowering season. Unlike its scented parent, it is fully tolerant of sun and open conditions (C. lutchuensis is inclined to yellow in the foliage in full sun), very free flowering and, en masse, it exudes a delightful scent on warmer, sunny days.
Camellia ‘Fairy Blush’ as a clipped hedge.
We have never grown much buxus hedging here but when the threat of box blight loomed (mercifully, it has still not reached us and we don’t have the buxus caterpillar in New Zealand), Mark took the opportunity to rip out a couple of box hedges and replace them with C. transnokoensis. I think the blight might just have been an excuse really, because the main reason was that he thinks hedges should be more than just green walls; they should also contribute to the eco-system and plants that flower and attract bees and butterflies do more than just act as a visual divider. C. transnokoensis has excellent small foliage and tiny white blooms but its flowering season is much shorter than ‘Fairy Blush’ and it is taking longer to become dense in its growth.
When it comes to tight clipping, timing is important. We tend to clip hard in early to mid-spring, just as the new growth is being made. If it gets left later, the next season’s flower buds will have set and clipping will be at the expense of next season’s flowering. Sometimes we get to the C. sasanqua plants earlier; in our relatively mild climate, we have more latitude and can garden through winter without risk. We only clip once but we are fine with the softer, woolly look that develops as the seasons progress. If you want a sharper look, do the hard spring clip and then follow up in summer, but just with a light prune to tidy up the wayward fresh growths.
C. microphylla will be kept lower as an undulating wave hedge, between 30cm and 70cm high.
Camellia microphylla backed by C. yuhsienensis
C. microphylla has an even shorter season in bloom and flowers in late autumn for us but we selected it less for its white, starry blooms and more for its very compact habit and small leaves which lends it to tighter clipping where we want low, undulating hedges in the area we call the Wave Garden. It is taking some time to grow and clip into the tight growth we want, particularly because the plants Mark had raised from both cuttings and seed languished, unloved, in pots in the nursery for longer than they should have. It took us a while to plan and then plant the garden they were destined to grace. Healthier plants would have taken off faster but we can see it will work exactly as planned.
Camellia yuhsienensis used as punctuation points, backed by Mark’s ‘Fairy Magnolia White’
It is possible to remove a lot of plant without it looking as though it has been brutally attacked if pruning is considered and careful. This is getting C. yuhsienensis back to a manageable size.
Overall, we do more pruning than clipping and that is aimed at keeping some key plants from growing to their full potential. Essentially, we are trying to contain them to a certain size. We have used the lesser-known species, C yuhsienensis, as punctuation points with winter interest along the summer gardens. We love its open, starry blooms which are lightly scented and reminiscent of a michelia as well as the heavy-textured foliage which many people fail to identify as a camellia. It is not self-grooming and it is one of the few camellias I am willing to go through and brush off spent blooms which is a sign of how much it pleases me. Left to its own devices, it will reach 2.5 to 3 metres high by 2 metres wide in our conditions, getting somewhat more open as it grows. I am keeping these to around 1.6 metres high and a metre wide and that is done on a single, perfectly straightforward annual prune with secateurs and sometimes a handsaw. Each plant is reviewed individually as I work out which branches I want to take out entirely and which ones I just want to shorten. It sounds more onerous than it is in practice but my aim is always that the pruning not be visible to other people’s eyes.
Camellia yuhsienensis
A top-worked hybrid of Mark’s we named ‘Pearly Cascade’ which is unlikely to still be in cultivation. While the flower is not special, the slow, spreading growth habit kept it small and made it an ideal candidate for training to a feature plant.
A top-worked (high grafted) weeper. This came to us as ‘Nuccio’s Pink Cascade’ but that may not be an accurate name.
We have a few high-worked standard camellias, grafted a metre or so up a single, strong trunk. These are not easy to do so certainly not widely available commercially here, if at all these days. Our plants date back to when we still had a plant nursery and specialised in unusual options. The weepers are just left to weep. These are ‘Quintessence’ and one that came to us ‘Nuccio’s Pink Cascade’ but I am now doubting that name because I can’t find it on line. I scrapped all the weeping ‘Sweet Emily Kate’ specimens because the exceptionally pretty flower did not atone for the dreadful yellowed foliage.
Our other standards are slow growing hybrids from Mark’s breeding programme that are not commercially available. The natural characteristics of being both slow and dense in growth is what makes them easy to maintain. Trying it with stronger growing varieties would mean a whole lot more work fighting nature to keep the desired shape.
When we removed the garden beds around the top of the sunken garden, we retained the eight camellias and three dwarf maples as clipped and shaped character plants.
Mark is not a lollipop or pompom man. He likes these camellias clipped to low, flattened domes – mushroom shapes he calls them, or maybe umbrellas. Again, we clip or prune just once a year and that is sufficient to keep these as statement plants.
An espaliered sasanqua camellia from another person’s garden.
I have never gone in for espalier. I am not so keen on that level of extended fiddle-faddling, myself. But I stopped to photograph a very well-established espalier done with C. x hiemalis ‘Elfin Rose’ in a garden down the road. Unfortunately, the flowering was finished for the season so you will just have to imagine how pretty it looks with the bright pink blooms and deep forest-green foliage. It has been trained on a readymade trellis fan and is kept clipped to make a dense screen which is only about 30cm deep.
In days gone by, I used to keep a small collection of trained and clipped camellias in large containers to move around to particular locations. Each one was treated differently to emphasise individual characteristics. The reason I planted them all out or gave them away was simply because I decided that, in a garden as large as ours, having large plants in pots that need regular watering, feeding, repotting and root pruning was too much work. I prefer to work on plants already growing in the ground but the container approach may work for other situations.
Camellia ‘Fairy Blush’ again
We used to view camellias as a low maintenance, undemanding but top performing utility plant in our garden. That changed with petal blight. Now their roles have changed. We treat each plant individually and give them a lot more attention but that is what makes gardening interesting for us. We wouldn’t be without them. It may be putting a brave face on it, but I am not sure I miss those days when they were largely big blobs of white, pink or red on shiny green foliage. Times change and we just change our gardening ways to meet the new situation.
In memory of times past when we used to have mass displays of blooms like this. We refer to this one as ‘Mimosa’s sister’, not because Mark’s mother ever had a sister but because it is a sister seedling to ‘Mimosa Jury’ that Mark’s father bred and named for her.
“Some ladies asked me why their plant had died. They had got it from the very best place, and they were sure they had done their very best for it… They had made a nice hole with their new trowel, and for its sole benefit they had bought a tin of Concentrated Fertilizer. This they had emptied into the hole, put in the plant, and covered it up and given it lots of water, and – it had died! And yet these were the best and kindest of women, who would never have dreamed of feeding a new-born infant on beefsteaks and raw brandy.”
Gertrude Jekyll, Wood and Garden (1899).
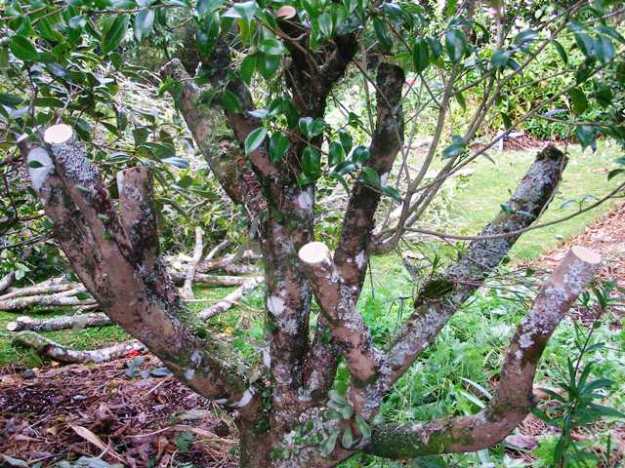
Cutting back to bare wood
Renovating old camellias
Not all big old camellias are things of beauty. But they are one of the easiest plants to renovate and now is the right time to carry out drastic pruning. If you cut a camellia off at ground level, most will resprout and come again. Even glyphosate doesn’t kill them. However, if you want to keep the plant, don’t cut it back to the ground because what you will get is a thicket of new shoots in spring. Look for the natural shape of the plant and cut off just above where the branches are well formed – usually about a metre up on an old plant. This means that when it flushes into growth, you will have an attractive and established shape already.
You can cut right back to bare wood with no foliage left at all. It is only the very occasional, contrary camellia that will die instead of rushing into growth.
The plant will respond by pushing out a mass of new leaves and you should have reasonable cover by the end of the first summer and a lovely bushy specimen which is flowering again a year later. If you can see mottling or variegation on the leaves, make sure you disinfect your pruning tools before you touch any other camellias. Camellias are susceptible to virus but that is not necessarily bad. It is what gives variegated blooms. However, you don’t want to transfer virus to specimens that are free of it, hence cleaning your tools. Household bleach will suffice as a disinfectant.
First published in the Waikato Times and reprinted here with their permission.