Tag Archives: Abbie Jury

In The Garden: November 18, 2011

A fortnightly series first published in the Weekend Gardener and reproduced here with their permission.
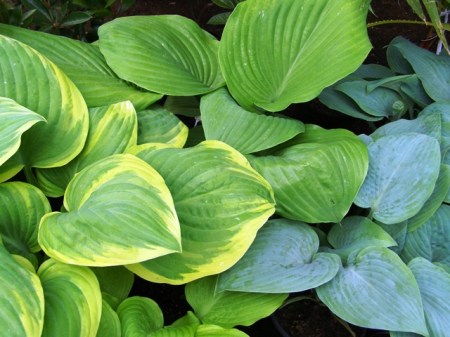
Planting out hostas now

Planting out hostas now

With our annual garden festival (now the Powerco Taranaki Garden Spectacular) over, it is back into the garden with a vengeance. The festival is incredibly important to us but standing on concrete all day every day for ten days on end, meeting and greeting visitors is far more tiring than a hard day in the garden. Unless we have a very wet spell, it is late for planting out woody trees and shrubs. Large plants will now be heeled into the vegetable garden because it has very well cultivated soil and offers easy planting and growing conditions, to be relocated next autumn. Any planting now requires wetting the root ball thoroughly. We plunge the plant, pot and all, into a bucket (or a drum for large plants) until the bubbles stop rising which means the root ball is saturated. This can take anything up to 30 minutes. Once a root ball has dried out, it is very hard to get it to take up water again without soaking.

We will continue planting out perennials, particularly hostas and bromeliads. Perennials in full growth can be divided now, as long as they are well watered and planted into well dug soil where they can get their roots out easily. We mulch with compost as a matter of routine, to enrich the soil and to keep moisture levels up in the soil before summer arrives. It also controls weeds, as long as you make a hot compost mix which kills any seeds in the composting process.
Top tasks:

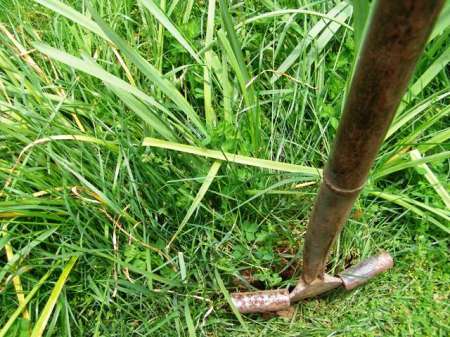
1) The daffodils in the lawn need to be lifted and separated. I will only replant the large bulbs. They have been there for many years and the flowering is now greatly reduced which means that either they need dividing or we have a problem with narcissi fly in them. If I leave it any longer, I won’t remember exactly where the bulbs are because the grass will cover them.
2) Narcissi fly are on the wing. They look like a small blowfly but with a yellow abdomen. Removing all foliage from narcissi bulbs will reduce problems as long as I cover the bulbs with dirt so the narcissi fly can’t lay its eggs in the hole left from the foliage. Mark also stalks the flies individually with a little sprayer of Decis, which is a synthetic pyrethroid.
3) Label overcrowded patches of spring bulbs which need lifting and dividing when they are dormant over summer.

On the case with Grandma’s violets (subtitled: it is hard to find the perfect groundcover).


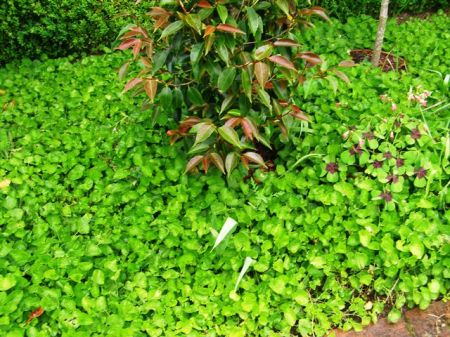
I see it was only a little over two years ago that I gave the death sentence to Rubus pentalobus (commonly called the orangeberry plant because few of us can recall its proper name) and chose Grandma’s violets as a ground cover instead. In fact they are more likely to Mark’s great grandma’s violets because they date back to the 1880s house site and have gently survived paddock conditions there ever since. Once divided and planted into the garden, they have taken off with alarming vigour. Sweetly scented and charming though they are in flower, they were starting to overwhelm everything in their path.

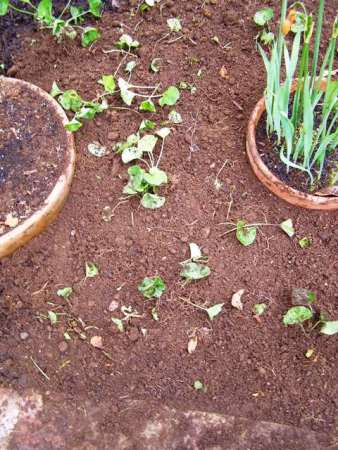
Last year we tried thinning the patch and it was a surprisingly difficult task because the violets had formed an impenetrable mat. I figured this year it would be easier to dig the entire patch and replant small divisions. Digging is only difficult when the ground is heavily compacted or with a blunt spade. Using a sharp spade, I cut the violets into squares as one does with turf. Each square was easy enough to lift.

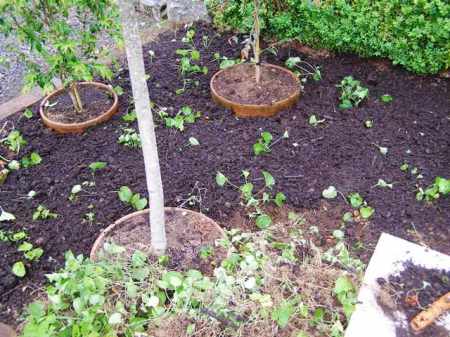
I raked over the bare soil to level it. Some of the clumps I had dug fell apart quite readily, giving me small divisions to replant immediately. Others, I pulled apart as required, spacing at around 15cm intervals.

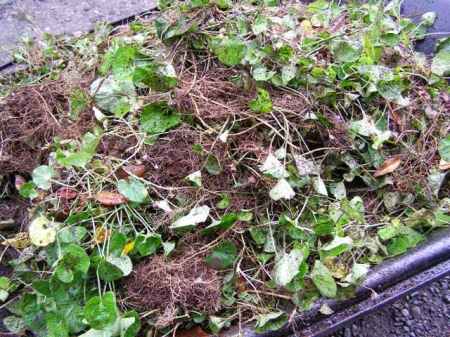
There was a large surplus of violets. Not every plant is precious. This barrowload (one of several) is destined for the compost heap.

A final topdressing of compost feeds the soil, reduces water loss from the poor stressed plants and makes the whole area look more attractive. There is an open verdict here as to whether I want to persist with a groundcover that looks as if it will need drastic digging and dividing every year. I will make the call next spring.

Plant Collector: Hippeastrum papilio

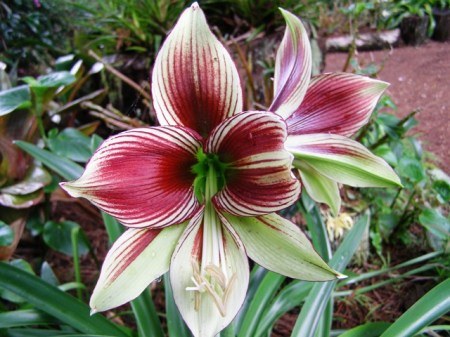
The exotic looking Hippeastrum papilio

The exotic looking Hippeastrum papilio

Papilio is Latin for butterfly, though it would be a pretty spectacular butterfly to rival this lovely bulb from Brazil. I think it is more orchid-like in its markings and colouring of burgundy, green and cream. In fact it is positively exotic and is a showstopper if you can get it flowering in the garden.

Hippeastrums are often misnamed as amaryllis. They belong to the Amaryllidaceae family but that does not make them amaryllis – that would be like saying parsley is the same as carrot because they come from the same botanical family. H. papilio is a species (which is as it occurs in the wild) although much hybridising has been done within the wider hippeastrum family to get spectacular named cultivars for showy pot plants. It grows from large bulbs and there are usually two flowers to each stem, each bloom being about 18cm across and held up well, without needing support.

The biggest problem here is the dreaded narcissi fly which lays its eggs at the base of the leaves. The larvae hatch and burrow down, eating the bulb from inside out. For this reason, we grow H. papilio as a woodland plant in a raised bed rich in humus. The narcissi fly seem to prefer the sunshine. The raised bed means excellent drainage which solves the other problem which is the bulbs rotting out in wet and cold winter conditions. We find it is largely evergreen here, keeping its foliage all year in normal conditions.

The bulbs are large and slow to increase so best left undisturbed for several years. H. papilio is sometimes offered for sale in garden centres but be prepared to pay a fair amount for it because it can take several years to get the bulb to flowering size.

The other hippeastrum species that we have great success with in the garden here is the beautiful winter flowering H. aulicum, also from Brazil.

Grow It Yourself – Parsley

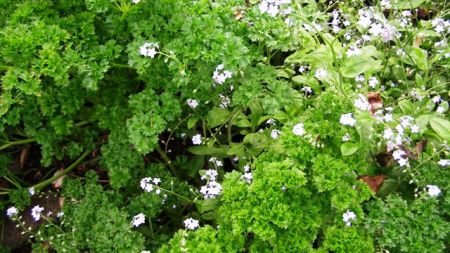
The parsley patch - naturalising nicely with the pretty but weedy forget-me-nots

The parsley patch - naturalising nicely with the pretty but weedy forget-me-nots

I am a huge fan of parsley. If you have a good big patch of it in the garden, you are never without a green veg, a garnish, a flavouring and a basic ingredient for all season pesto. Chop it through pasta, serve a thick layer on soup, use abundantly in coatings for foods – the options for use are numerous as long as you have plenty available. It is particularly useful in the depths of winter when you may have a shortage of other fresh greens. And you can feel virtuous because it is full of goodness if you eat enough.

The critical aspect of ensuring that you have an uninterrupted supply is to get it established two years in a row because this is a biennial plant. In its second year, it will set seed and die. As long as you leave at least one plant to go to seed, parsley can naturalise itself and pop up gently throughout the vegetable garden or even in the flower beds. Once you have established it two years in a row, it should continue under its own steam as long as you let some of the seedlings grow and are not too vigilant on the weeding.

There are two types of parsley – curly leafed (which is arguably more flavourful and easier to chop) and flat leafed Italian (which is allegedly sweeter and is certainly more trendy in modern recipes). Both grow in the same conditions so you can have either or both. Parsley is usually started in the first instance from seed. Be patient. It can take several weeks to germinate. While it is starting, it needs to be kept moist so if you are planning on sowing some, start before the dryness of summer. After that, just let it grow and start picking. It does not require any care and is generally free from pests and diseases.

First published in the Waikato Times and reproduced here with their permission.

In the Garden: November 4, 2011

The start of a new fortnightly series first published in the Weekend Gardener and reproduced here with their permission.

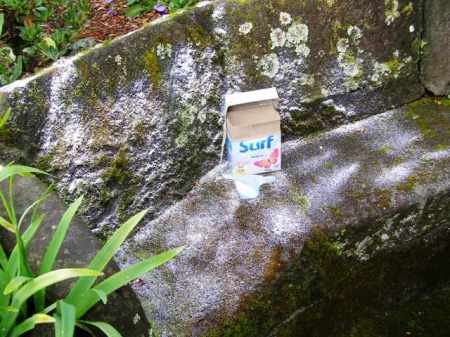
An easy method of killing unwanted moss

An easy method of killing unwanted moss

With our garden festival currently in full swing (now styled the Powerco Taranaki Garden Spectacular), all our efforts in the garden have been on presentation for the most important days of our garden visitor year. We call this garden grooming – a bit like giving your car a valet treatment. It doesn’t last long but it looks great in the meantime. When it comes to the lawns, we have made a deliberate decision to avoid chemical use where possible, both for weed control and fertilising. We use a mulcher mower, an edger and we hand dig flat weeds. As long as the rest is comprised of small, fine leafed green plants which mow well, we are willing to live with a mixed colony rather than just rye grass and fescue. At least our lawns are not toxic.

We don’t worry too much about moss in the lawns – it occurs most in shade where the grasses struggle. And if we were Japanese, we would revere the moss. But with our high rainfalls and humid conditions, we get a lot of moss growth on paths, brickwork and stonework. Often I will sprinkle soda ash (which is simply powdered washing soda crystals available from bulk bins) which kills the moss overnight. Indeed, cold water washing powders work equally well though I have found the leading brands are better than the budget brands – perhaps they have more water softener in them. Our chemist daughter reassures me that there should not be any problems of toxicity in using soda ash or washing powder to kill moss though if you get too carried away over time, you will be altering the pH of your soils because they are alkaline. I have experimented on grass and it kills moss without harming the grass. Do not do as someone I know – use so much that when it rained, his entire lawn foamed. The moss dies but does not disappear so you have to rake it out of lawns and brush it off hard surfaces.

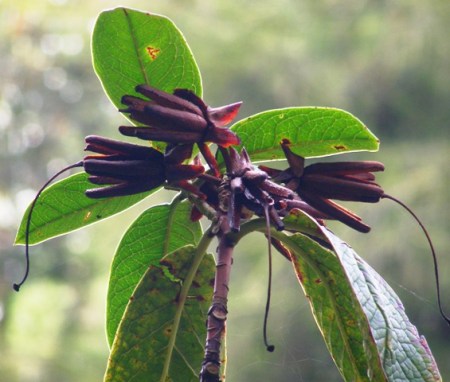
Rhododendron seed head, missed from last year

Rhododendron seed head, missed from last year

Top tasks:
1) Deadheading rhododendrons. While conventional wisdom is that all rhododendrons including vireyas need deadheading, in fact only those that set seed need it. Setting too much seed can weaken a plant and even cause it to die over time. The others just look better for having it done.
2) Mulching garden beds. There is no point in mulching dry soils so we like to get it on before summer. We mulch frequently with homemade hot compost mix which means we rarely need to fertilise garden borders.
3) Getting the planting out of this season’s trees and shrubs completed. November is getting late for this but we soak all root balls thoroughly and can generally rely on regular rainfall here in North Taranaki.