
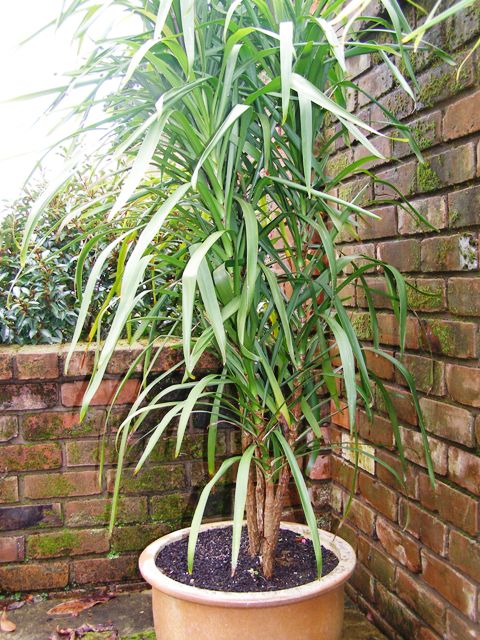
1) Most cordylines or cabbage trees grow a solid, fleshy tap root below the soil and it is easy to increase plants from sections of these roots, commonly called toes. This particular cordyline is an Australian species, stricta, but it shows similar structure below ground to our most common NZ cordyline which is confusingly named Cordyline australis.
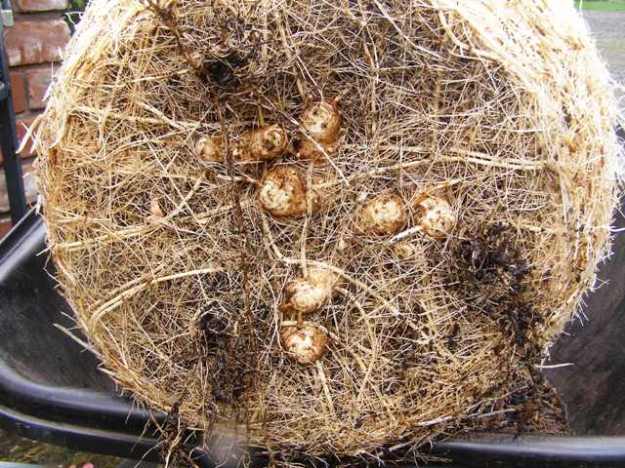
2) Taking the toes off this cordyline will reduce the size of the root mass and allow me to replant it back to the same pot with fresh mix and fertiliser. Container plants are best repotted annually if possible and will generally deteriorate badly if you leave them any longer than three years without repotting.

3) Shake off the mix. Wash it off if necessary so you can see what is there. The same steps apply if you are lifting a cordyline out of the garden. We have never tried taking the toes off a large, established plant while leaving it in the ground although you can presumably do it without killing the plant because Maori used to harvest the toes as kauru – a form of starch similar to root vegetables. Try digging in from one side of the plant only if you plan to try this.
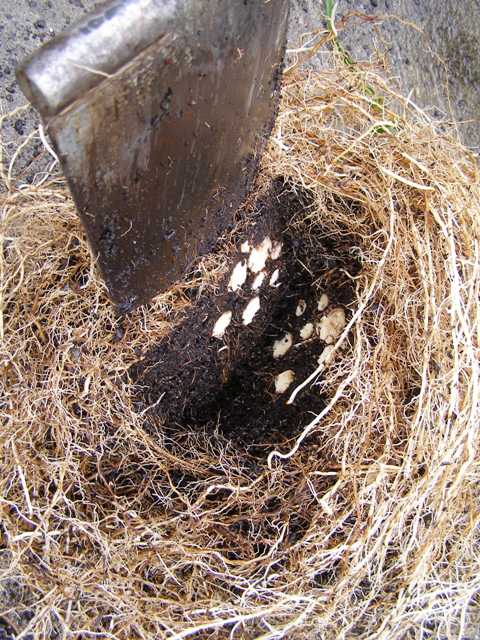
4) Because the toes can be very tough, a sharp spade or saw may be needed to cut the lower section off. We cut around 15cm off the bottom of the central root system of the plant.
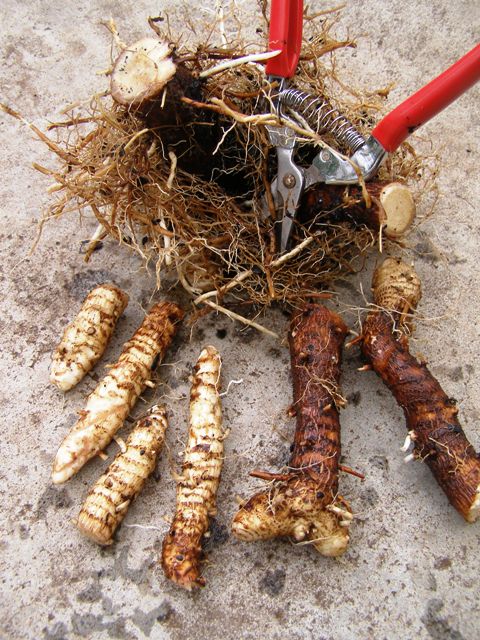
5) If you wash the cut section, you are better able to see what you are doing. Cut the roots off the toes. They will die back anyway. If you want plenty of plants, cut the biggest toes into sections but don’t go much smaller than about 3cm in length.
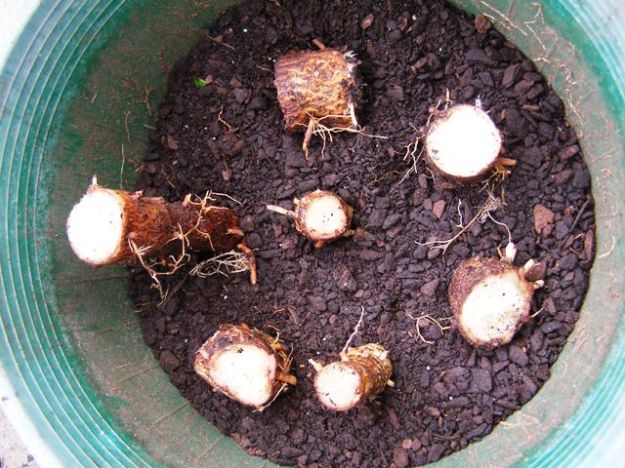
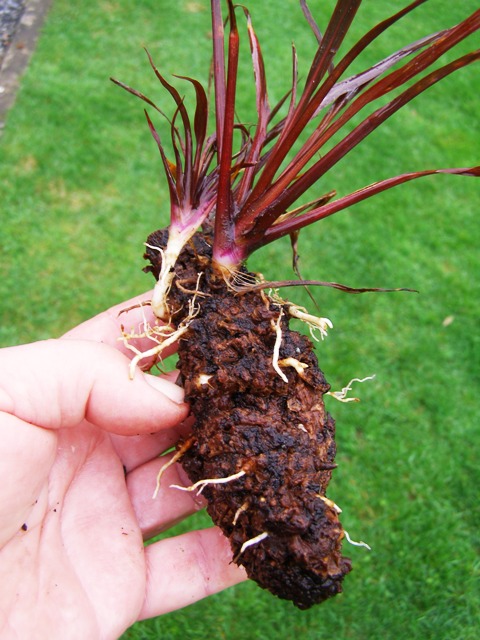
6) Pot the toes fairly close to the surface, either flat or on end (cut side up on the whole toes because that is the top) in seed raising mix (low nutrient potting mix). Do not let them get too wet or they may rot. Within a few months, they will be sprouting afresh as shown on this toe of Cordyline Red Fountain.
 1) This tree aloe (Aloe thraskii) is in the wrong place and has been for at least fifteen years. Large plants can be moved, but this involves taking a large enough root ball to support the top. It is best carried out between late autumn and early spring so that the plant has a chance to settle in and put out new roots before summer.
  2) A large trench needs to be dug out, wide enough for you to stand in. This trench is around 60cm deep. Dig it with straight sides to start with. It allows you to look at the plant’s roots and to get access right underneath the plant. Keep it well out from the plant because you can make the root ball smaller but you can’t make it larger again.
 3) Standing inside the trench, start digging to excavate right underneath the plant. We wanted to keep the root ball relatively whole to act as an anchor because this plant is very top heavy. Gradually reduce the size of the clump, removing excess dirt, keeping a close eye on the root system. If it has a huge root system, you don’t want to be cutting into it too much. If it has a smaller root system, you can reduce it to a size that is more easily managed. We were surprised at how small the root system was on this plant and they were mainly on the surface.
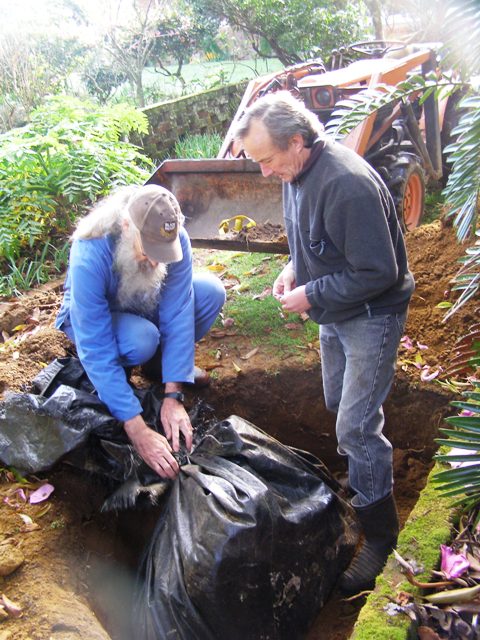 4) Get some heavy plastic, sacking or old weedmat underneath the plant. Do this by rocking the plant to one side and getting the wrapping right underneath it. This usually requires more than one person. Do not let the roots dry out at any stage. With very big plants, the plant can be raised out of the hole by tilting it to one side and backfilling that side. Then rock the plant back and put dirt in on the other side. Repeat the process until you have raised the plant to the level where you can lever it out of the hole more easily. We moved this plant on the front bucket of our baby tractor. You may need to do it by trailer.
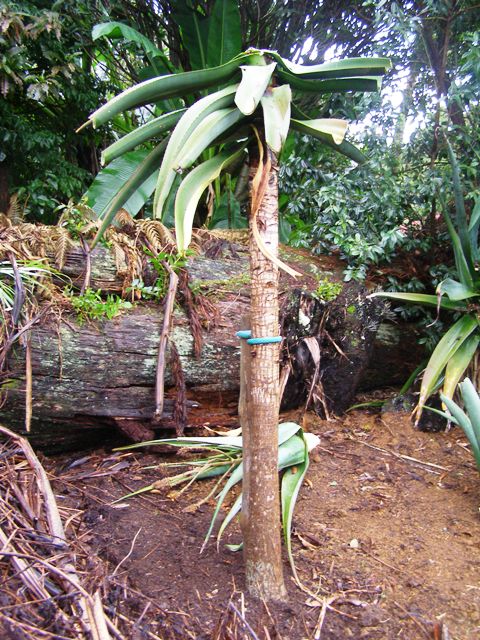 5) In this process, we had an accident and the heavy top was knocked out so we were forced to cut the the poor aloe back but there is no reason why it should not recover. Get the planting level as close as possible to where was. Measure the depth of the root ball and the depth of the hole before planting by placing a board across the hole and measuring from that. Put the stake or stakes in before the plant so that you do not cause more damage to the roots by driving the stakes through them later. We have gone for one very strong stake and a flexible tie.
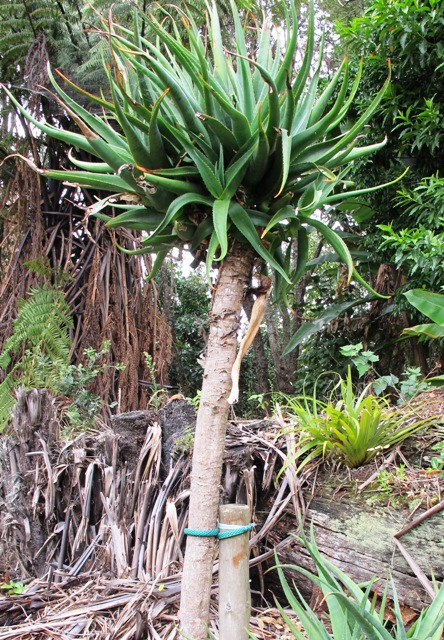 6) Two years later and the plant is recovering well although the foliage has yet to reach its former spread. It should now be safe to remove the stake.


