Tag Archives: gardening

Outdoor Classroom: Moving large plants, a step-by-step guide

???????????????????????????????1) This tree aloe (Aloe thraskii) is in the wrong place and has been for at least fifteen years. Large plants can be moved, but this involves taking a large enough root ball to support the top. It is best carried out between late autumn and early spring so that the plant has a chance to settle in and put out new roots before summer.

??????????????????????2) A large trench needs to be dug out, wide enough for you to stand in. This trench is around 60cm deep. Dig it with straight sides to start with. It allows you to look at the plant’s roots and to get access right underneath the plant. Keep it well out from the plant because you can make the root ball smaller but you can’t make it larger again.
???????????????????????????????3) Standing inside the trench, start digging to excavate right underneath the plant. We wanted to keep the root ball relatively whole to act as an anchor because this plant is very top heavy. Gradually reduce the size of the clump, removing excess dirt, keeping a close eye on the root system. If it has a huge root system, you don’t want to be cutting into it too much. If it has a smaller root system, you can reduce it to a size that is more easily managed. We were surprised at how small the root system was on this plant and they were mainly on the surface.
???????????????????????????????4) Get some heavy plastic, sacking or old weedmat underneath the plant. Do this by rocking the plant to one side and getting the wrapping right underneath it. This usually requires more than one person. Do not let the roots dry out at any stage. With very big plants, the plant can be raised out of the hole by tilting it to one side and backfilling that side. Then rock the plant back and put dirt in on the other side. Repeat the process until you have raised the plant to the level where you can lever it out of the hole more easily. We moved this plant on the front bucket of our baby tractor. You may need to do it by trailer.
???????????????????????????????5) In this process, we had an accident and the heavy top was knocked out so we were forced to cut the the poor aloe back but there is no reason why it should not recover. Get the planting level as close as possible to where was. Measure the depth of the root ball and the depth of the hole before planting by placing a board across the hole and measuring from that. Put the stake or stakes in before the plant so that you do not cause more damage to the roots by driving the stakes through them later. We have gone for one very strong stake and a flexible tie.
???????????????????????????????6) Two years later and the plant is recovering well although the foliage has yet to reach its former spread. It should now be safe to remove the stake.

Planting an easy-care hanging basket of succulents: step-by-step with Abbie Jury and Chris Sorensen

If you are an admirer of other people’s hanging baskets but lack the resolve to feed weekly and water up to three times a day in the height of summer, you may enjoy constructing one from easy-care succulents.

photo-1-copyphoto1a-copy

1) You can use solid plastic hanging baskets or you can chose to use wire baskets with a coconut fibre lining which allow you to plant all around the basket surface. You can even tie two hanging baskets together to create a round ball. It doesn’t matter whether your pieces of succulent plants have roots or not but if they are just cuttings, it can help to cut them a day or two early and let them dry

2) Cut slits or holes at random intervals all over the basket lining. Turn the basket upside down for planting.

step3-copystep3a-horizontal-copy

3) Poke the stems of the succulents through the holes. If you have rosettes without stems, bend flexible wire to make hoops around 8cm long and use these to skewer the rosettes into place. Smaller rosettes are not as heavy so are less likely to fall out.

4) Supporting the plants with your hand, turn the basket up the right way and gently hold it in a suitable sized bucket. Fill the basket with a free draining potting mix containing slow release fertiliser. Succulents can survive in poor, dry conditions but they will grow better with food and water. However be mean, rather than generous if you are adding the fertiliser yourself.

5) Plant the top of the basket with some trailing types of succulents so they can hang over the side. You may wish to include one or two flowering plants such as impatiens to add seasonal colour.

6) This basket was planted about three months ago and already looks well furnished and healthy.

Finally, as a modern postscript from 2017 (because I see people are still looking at this post), I give you the succulent display to celebrate the 10th anniversary of the new glasshouse at RHS Wisley Gardens in the UK. Not exactly a hanging basket but showing a similar basic technique.

Winter pruning apple trees: step-by-step guide Abbie Jury and Colin Spicer

Apple trees benefit from a little attention in winter and in summer – easy care summer strategies for apples.
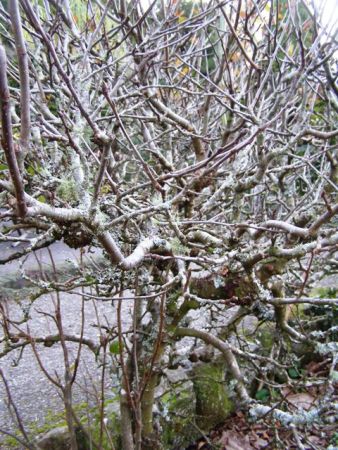
1) This dwarf apple tree has not has not had any attention other than a light haircut in winter and again in summer for many years. It is congested and overgrown and while it still fruits, the quality of the crop will improve in better conditions.
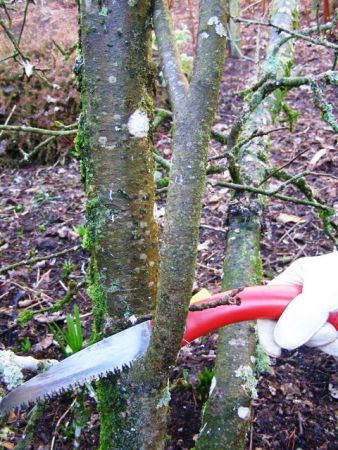
2) Select the branches which will give the tree its framework. Keep the main leader in the centre of the plant and choose branches which are well spaced to allow for air movement and maximum light. Remove all surplus growth not needed for this framework, including branches which cross each other. We are pruning for a tree which is more or less an espalier shape – two dimensional with height and width but little depth because it grows in a narrow border beside our driveway.
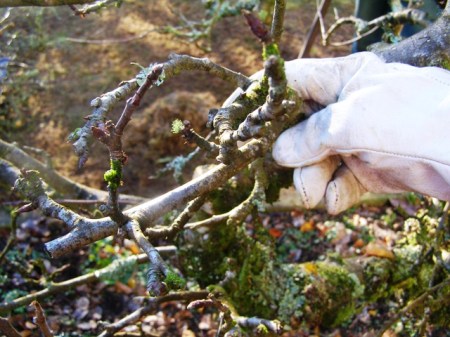
3) Now that the basic shape of the tree has been restored, thin out the clusters of fruiting spurs. Apples will continue to set fruit on old spurs for several years, but best results will be on growths from one to three years old. Where a spur is cut off, the plant will usually push out a fresh growth in spring.
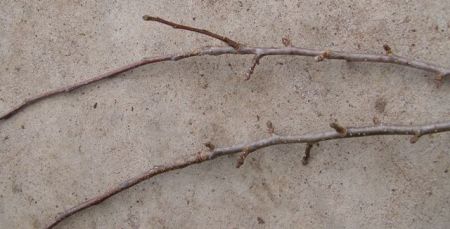
4) This shoot shows two years of growth. The lower half was new growth made in spring two years ago and the upper half is growth from last spring. You can see the fruiting spurs forming on the 2008 growth. These will flower and set fruit this year. If you make the mistake of always pruning by trimming off the long whippy new growths, you are cutting off all the fresh fruiting spurs. Try to get a mix of fresh spurs and already established spurs so that you are encouraging gradual replacement.
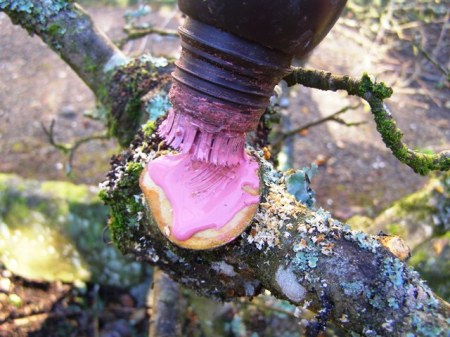
5) Sealing the cuts is optional but strongly recommended by our visiting pruning expert. He applies Bacseal which is an antibacterial sealant. Avoid getting this on your hands and always wait until you have finished all the pruning to avoid brushing wet surfaces with your skin or clothing.
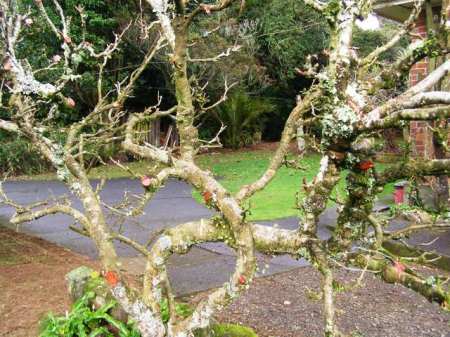
6) A spray of lime sulphur will clean up the heavy lichen infestation. Follow up with a copper spray at winter strength in three weeks time to get the tree into a much healthier state. Follow the instructions on the containers for dilution rates for both sprays.

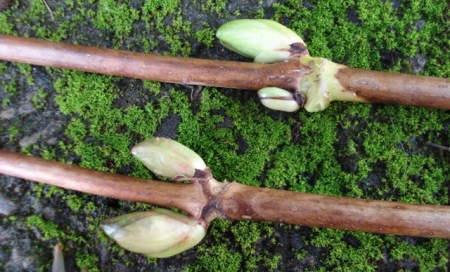
Outdoor Classroom – Winter pruning Hydrangea macrophylla

The common hydrangeas grown here belong to the macrophylla family. These give us most of the traditional mop-tops along with the flat heads of many lace-cap varieties. Less common hydrangea species (the ones with oak leaves, cone flower heads, evergreens and the like) often have different pruning requirements.

1) It is not essential to prune hydrangeas. They will still flower if not pruned but you will usually get many small flowers on a bush which grows ever larger. Pruning takes place to keep the bush smaller and tidier and to encourage bigger blooms.

2) Most hydrangea stems will have a series of buds in pairs visible down their length. The fat buds are flower buds. The thin, small buds are leaf buds. Ideally you want pairs of fat buds, because that will be two flower heads but sometimes you find one fat bud paired with a small leaf bud. You will only get one flower from that spike.

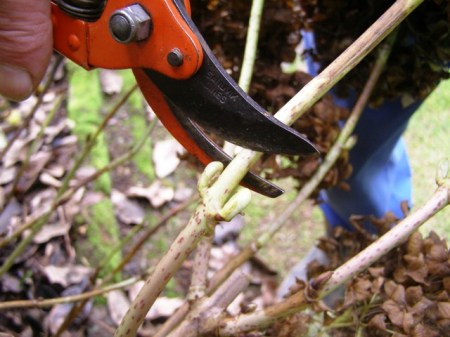
3) Using secateurs, prune back to the lowest pair of fat buds. If that is still much taller than you want, trim back to the lowest single fat bud.

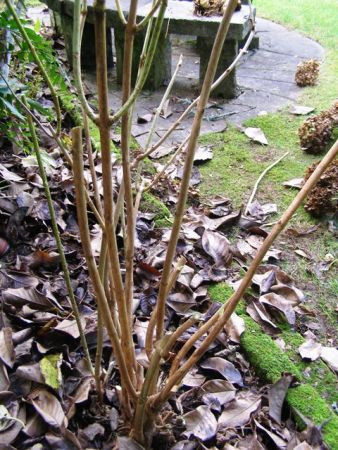
4) After you have reduced the height of each stem, look at the clump and take out any really old, thick, woody stems and any spindly weak ones. You can also take out stems which are headed sideways and those with no flower buds if you want to keep your bush more compact.

5) Because most hydrangeas flower on last year’s growth, if you cut too low down and without taking any account of the difference between leaf buds and flower buds, you will have cut all this summer’s flowers off. You can cut off near to ground level if you want to rejuvenate an old plant and it will shoot again but you will have to wait 18 months for flowers. We have pruned for flowers on this plant.

Pruning a rampant climber: step-by-step with Abbie and Mark Jury

1) This climber has gone well past the point where a light trim will suffice and allow more light in the window behind. However, we don’t want to dig it out and cutting it off at the ground is likely to kill it. This is an ornamental jasmine (not the dangerously rampant variety) and we like the fragrance.

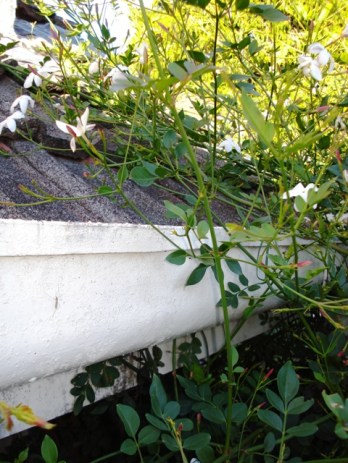
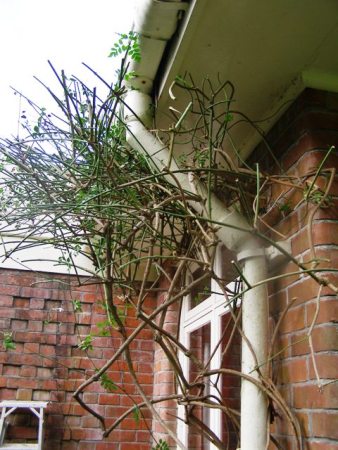
2)The tendrils going over and under the spouting, and even worse, under the roof tiles are a warning that action needs to be taken now. Looking into the mass of vines, you can see that the downpipe is under threat and also that the plant is putting out new growth from the middle and not just on top.

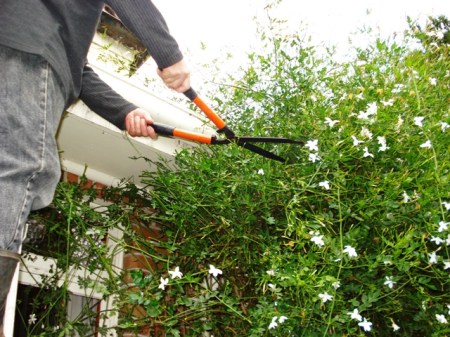
3) Cut back the foliage hard. We are aiming for a curved shape around the corner of the house. It is easier to work out which vines to keep when you can see where each one is headed. You can use a chainsaw for the initial shaping and follow up with clippers and secateurs to tidy up the rough cuts.

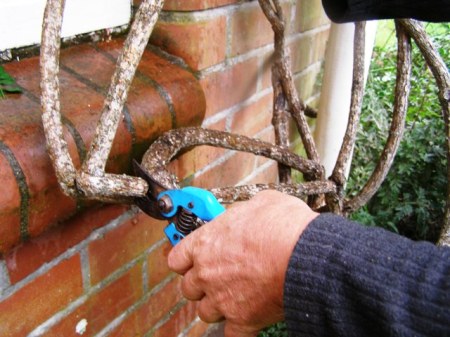
4) Trace the path taken by the vines and remove unwanted stems in sections. If you try and pull it out in long lengths, you run the risk of damaging the growths you want to keep. We are trying to protect the house and to allow the window to be opened so we are thinning extensively. More frequent pruning would have avoided this.

5) Thin out clutter and remove all dead wood.

6) The finished product looks shorn and a shadow of its former self but should grow away strongly. In our mild and soft climate, we can do this type of cutting any time of the year but gardeners in cold, inland areas may wish to wait until late winter or early spring, timed for just before the plant will put on its first flush of new season’s growth.

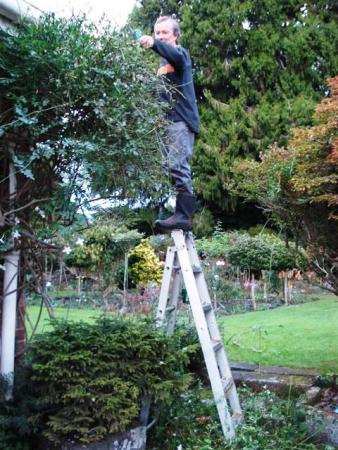
7) This is the photo that we did not use in the newspaper when this feature first ran – not perhaps the best advertisement for safe practice (though Mark asserts that he was holding on tightly with the hand which is out of sight…).