
1) Contractor’s barrows tend to be larger, more solidly built, heavier and more expensive than garden barrows. Better quality barrows can cost from $200 but these two barrows have been used on an almost daily basis here over 10 years. Some women may find the handles too thick to use comfortably and the barrow too heavy.

2) Metal or plastic tray? Metal trays can last the distance if you look after them and don’t leave them out in the rain or full of debris. Because I am guilty on all counts, I strongly prefer a plastic tray with galvanised steel frame, neither of which will rust, but this is considerably more expensive. This garden barrow is pretty much top of the range, costing around $180 but I like its wider shape and its stability and I have two of them.

3) Cheap barrows are usually in the $38 to $60 range and commonly have a light metal construction which is prone to rust if you don’t look after them. They also have a tendency to tip back if you don’t load them properly. However, with some care, the much cheaper price may be sufficient to offset those disadvantages.

4) Most wheelbarrows are sold in flat packs. Make sure you try out an assembled one in the store before you buy so that you know that you will find it comfortable to use and that it has acceptable stability. If you assemble the barrow at home and find that the wheel is loose with no means of adjustment, return it to the store. A wobbly wheel is a major weakness from the start. If you ever come across barrows with small or narrow wheels, shun them. You need a robust wheel to support the weight of a load.


5) If you store your barrow leaning against an outside wall, make sure that rain can not get down the handles because it will pond in the pipes and quickly rust from the inside out.
6) I have never tried the new tub style of barrow and can’t see that they have any advantage over the traditional barrow which has been around in more or less the same form for 800 years in Europe and up to 2000 years in China where they were invented to carry military supplies. However, should any readers swear by this new design, I would be happy to hear. Otherwise, I suggest you borrow one to try before you spend between $75 and $150 on buying one.
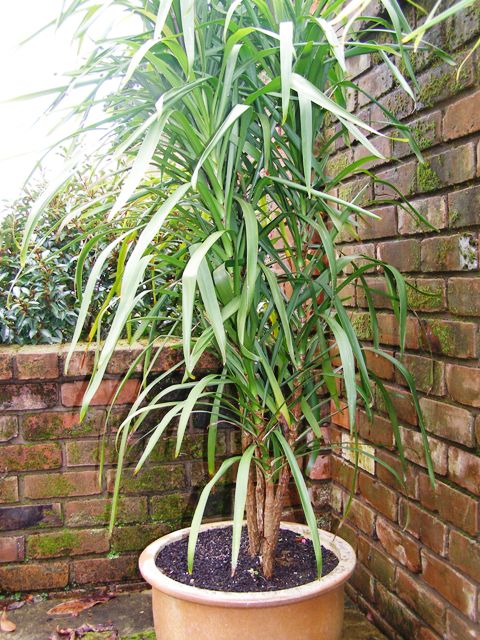

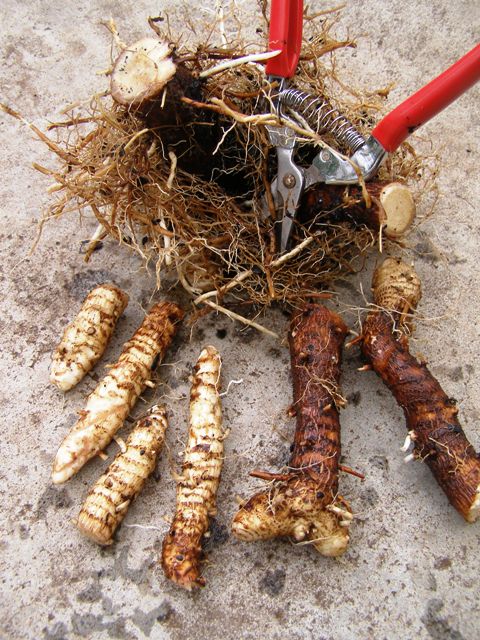
 1) This tree aloe (Aloe thraskii) is in the wrong place and has been for at least fifteen years. Large plants can be moved, but this involves taking a large enough root ball to support the top. It is best carried out between late autumn and early spring so that the plant has a chance to settle in and put out new roots before summer.
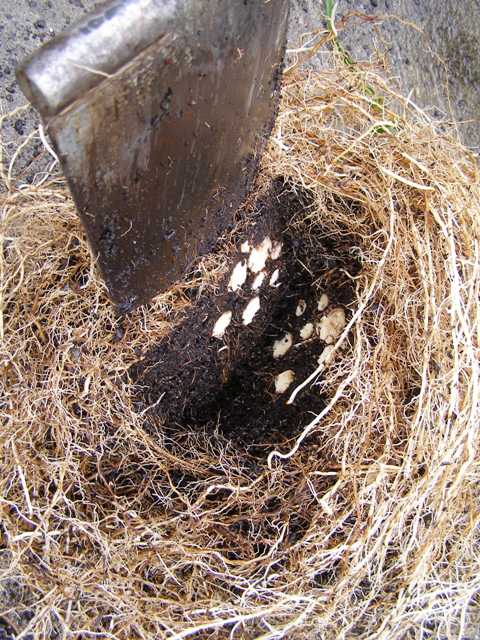
  2) A large trench needs to be dug out, wide enough for you to stand in. This trench is around 60cm deep. Dig it with straight sides to start with. It allows you to look at the plant’s roots and to get access right underneath the plant. Keep it well out from the plant because you can make the root ball smaller but you can’t make it larger again.
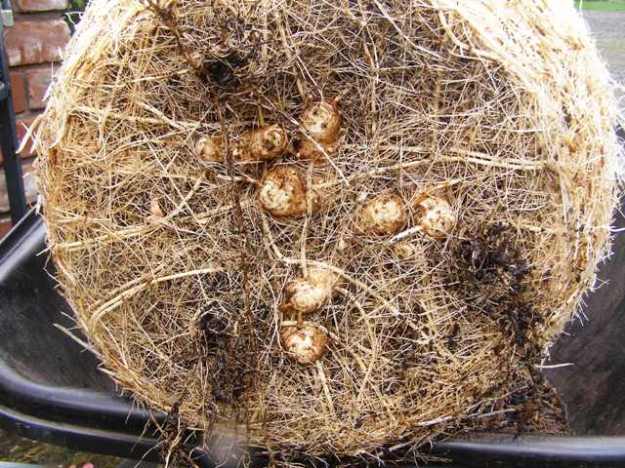
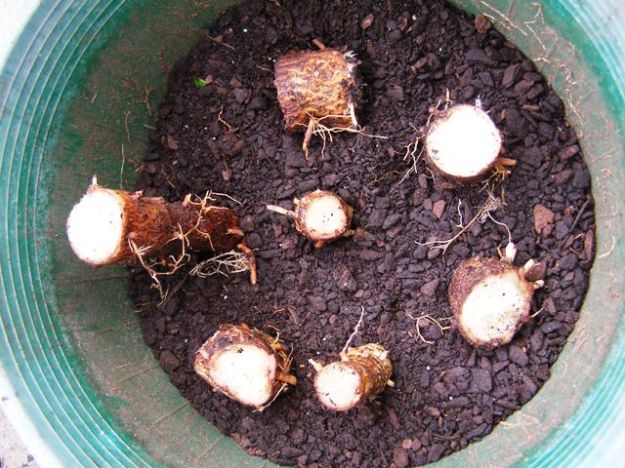
 3) Standing inside the trench, start digging to excavate right underneath the plant. We wanted to keep the root ball relatively whole to act as an anchor because this plant is very top heavy. Gradually reduce the size of the clump, removing excess dirt, keeping a close eye on the root system. If it has a huge root system, you don’t want to be cutting into it too much. If it has a smaller root system, you can reduce it to a size that is more easily managed. We were surprised at how small the root system was on this plant and they were mainly on the surface.
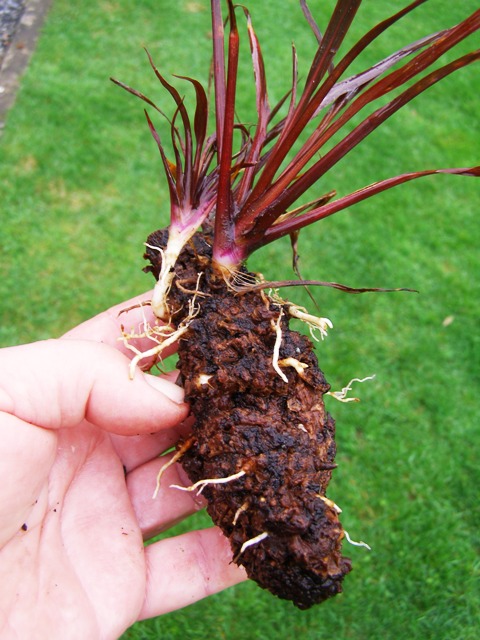
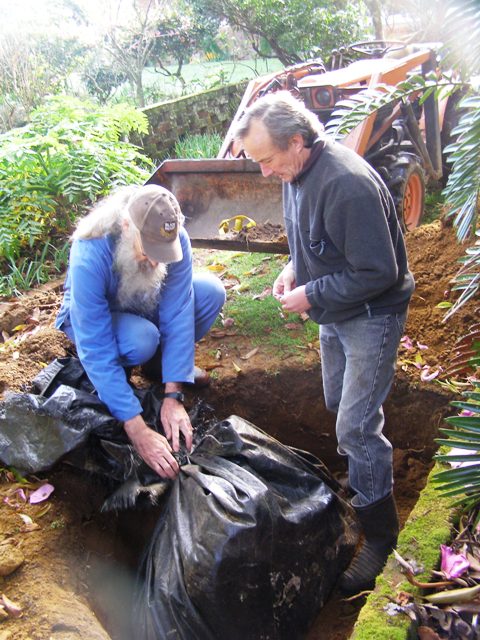 4) Get some heavy plastic, sacking or old weedmat underneath the plant. Do this by rocking the plant to one side and getting the wrapping right underneath it. This usually requires more than one person. Do not let the roots dry out at any stage. With very big plants, the plant can be raised out of the hole by tilting it to one side and backfilling that side. Then rock the plant back and put dirt in on the other side. Repeat the process until you have raised the plant to the level where you can lever it out of the hole more easily. We moved this plant on the front bucket of our baby tractor. You may need to do it by trailer.
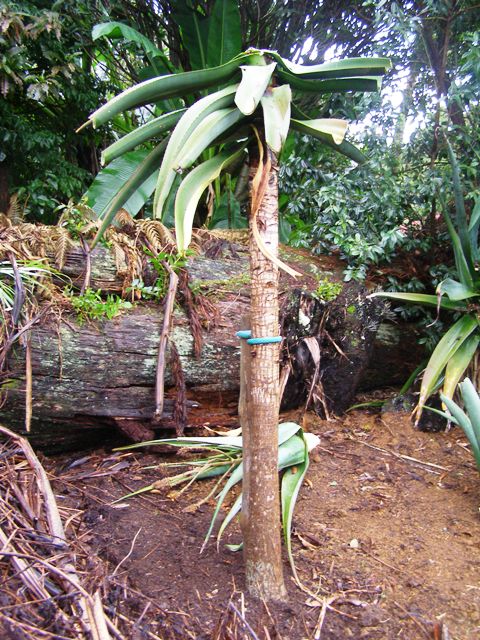 5) In this process, we had an accident and the heavy top was knocked out so we were forced to cut the the poor aloe back but there is no reason why it should not recover. Get the planting level as close as possible to where was. Measure the depth of the root ball and the depth of the hole before planting by placing a board across the hole and measuring from that. Put the stake or stakes in before the plant so that you do not cause more damage to the roots by driving the stakes through them later. We have gone for one very strong stake and a flexible tie.
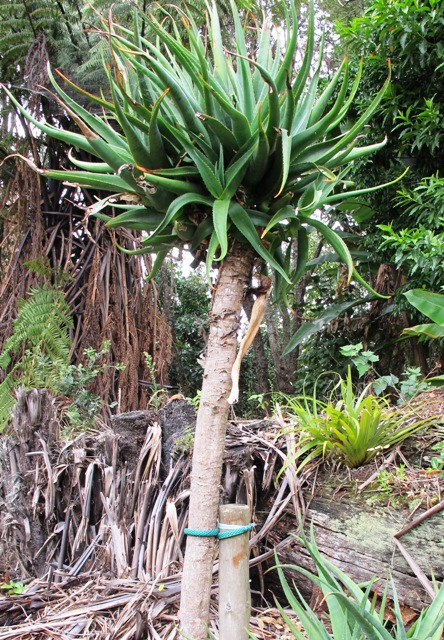 6) Two years later and the plant is recovering well although the foliage has yet to reach its former spread. It should now be safe to remove the stake.


