Tag Archives: gardening

In the Garden this week: January 28, 2011

• A point of clarification from last week: if you want to try water retention crystals (Saturaid, Crystal Rain or similar) on a dry lawn, you must rake them in, not just leave them scattered on top. Otherwise you will just hoover them all up with the lawnmower.

• If you read the article on the food pages of our local paper last Tuesday about pine nuts, you may be interested to know that they are easy enough to grow here. Pinus pinea, the Italian stone pine, is the most common variety though there are other species suitable for seed (pine nut) production. However, and it is a big however, as soon as it comes to harvesting the seeds and peeling off the outer coating of each seed, you will realise why they are relatively expensive in the supermarket. You are more likely to decide that they are actually extremely cheap to buy instead.

• If you needed an extra reason to get motivated to plant a winter vegetable garden, the Australian floods may be it. Vegetables are tipped for hefty price rises this year – it is all a matter of supply and demand. So start digging. If you are working on grassed areas skim off the top layer of turf and stack it to one side to rot down. Or, if you are not determined to be organic, spray with glyphosate (formerly known as Round Up) which will also kill off most of the perennial weeds (but not clover). Current evidence is that glyphosate is safe to use when applied according to directions. It has been around for many years now so there has been time to discover lingering ill effects or contraindications.

Last weekend's rain means it is safe to return to planting out herbaceous material

Last weekend's rain means it is safe to return to planting out herbaceous material

• With the heavy rain last weekend and more forecast, we have resumed planting but only of herbaceous material, not woody trees and shrubs which will get stressed when we next dry out again. Herbaceous material is quicker to establish itself and to get its roots out and it responds much faster to watering if necessary. I have been digging, dividing and replanting an enormous clump of Ligularia reniformis (the tractor seat one) – but cautiously. It is within reach of a hose just in case.

• If your potatoes are showing signs of blight (dark brown wet patches on the leaves), you have to be in really early with a fungicide spray to stop it. If the foliage is already collapsing, it is too late. Dig the potatoes immediately and you may save some of the crop. Delay and the blight will also infect the potato tubers. You have to remove all the diseased foliage and tubers to try and stop the fungus from remaining. Either burn the affected plants, put them out in the rubbish or hot compost them. Don’t just throw them in a heap or cold compost them. It is this blight (Phytophthora infestans) that caused the Irish potato famines.

• On the grounds that a few phone calls asking the same question may indicate a landslide of curiosity out amongst the readership, I found the rolling compost maker shown in Outdoor Classroom last week at Mitre 10 Mega in New Plymouth. This is not to say that other outlets do not also have it in stock – I did not look further.

Make your own compost hot mix, step-by-step (part two of three)


Compost part one, saw us looking at low tech, low input ways of dealing with green waste. Here we look at how to make hot compost which sterilises the mix.

1) Compost needs five ingredients:
a) nitrogen
b) carbon
c) oxygen
d) water
e) microbes.
You need to actively manage the process with a hot compost mix. The common failing of the black plastic drum as a compost bin is the lack of carbon and the lack of oxygen which means you get a soggy, sludgy mess. Carbon comes from dry, woody material – twigs (cut up small), newspaper (needs to be shredded or scrunched up), wood chips, sawdust (not tanalised), wood ash, dried leaves. As we make a lot of compost, we get much of our carbon content from the mulcher or wood chipper. Carbon content should comprise close to half the total volume of your compost and, as it is often bulkier, it creates air spaces in the mix.

2) The other half, or a little more than half, of your compost ingredients comes from the green waste (which is the nitrogen component). This includes all green leafy waste, animal manure, food scraps and lawn clippings. Compost microbes will come in with the grass clippings, or you can add some of your old compost mix (the old twiggy bits can go through again).

3) We simply pile it all in a heap until we get enough to work with. Wooden compost bins are a tidy option for the small garden. You need three – the first to accumulate the waste, the second to make it in and the third for compost which is ready to use. Make sure that you can remove all the boards from at least one side to make it easy to move the compost through the bin cycle. Each bin needs to be around a cubic metre at the least. A ring of chicken netting is the low tech method of keeping your growing compost pile contained and is probably easier to work with though less tidy.

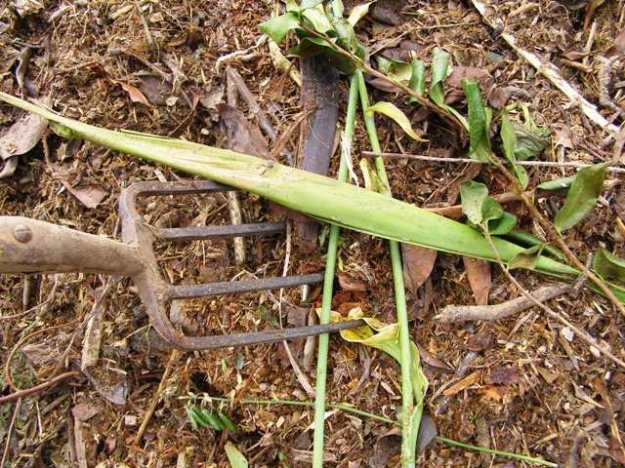
4) When you have sufficient volume to work with, adding nitrogen in the form of fresh grass clippings, fresh animal manure, urea or blood and bone will give your compost a kick start to generate heat. Mix it all up. When done by hand, the garden fork is the usual tool to mix. We do the mixing with a baby tractor which is admittedly easier but a little excessive for small town gardens. Cover the heap from here on.

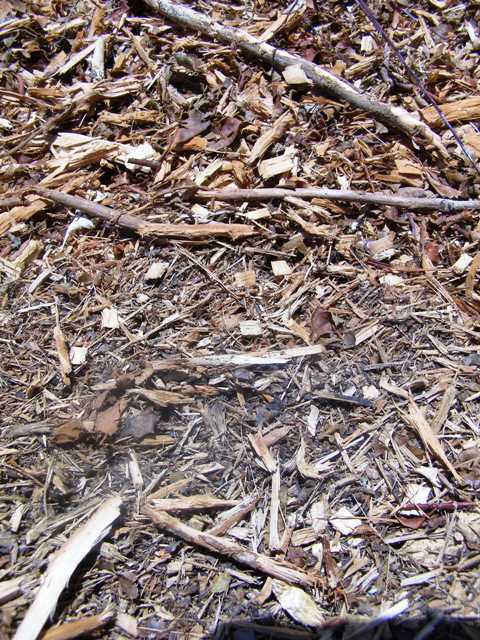
5) The heat should reach between 55 and 75 degrees Celsius within a few days. Turn the heap again – sides to middle – to get the whole lot working. You can see the clouds of steam pouring out of our heap which indicates heat. There will be no worms or insect life in hot compost mix. The heat should also kill off weed seeds and undesirable pathogens. Ideally, turn a third time a few weeks later.

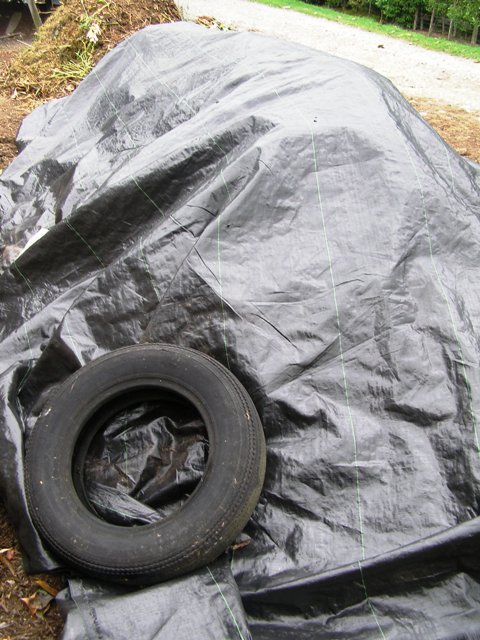
6) Cover and leave the compost to cure for a couple of months or longer. The compost will now cool down and it should be light, friable (almost fluffy), clean and have no offensive odour. In our high rainfall climate, we recommend covering with something reasonably waterproof to prevent the goodness from being leached out. We use old weed mat weighted down at the base. You can also use heavy duty black polythene. Boards or corrugated iron are common on a tidy compost bin structure.

Part three – making cold compost mix.

Make your own compost step-by-step guide: part one (of three parts)

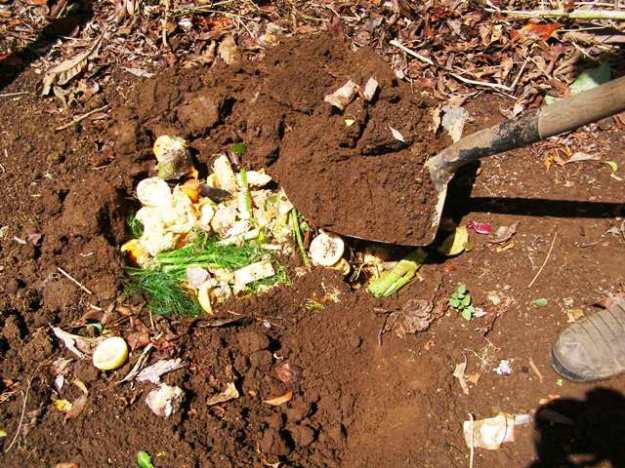
1) Trenching is a traditional method. This involves digging a trench down a row of the vegetable garden and burying kitchen scraps and green waste, covering it immediately with soil. It is easy and tidy and the worms and microbes will break it down quickly but it only fertilises a small area at a time. There is no heat generated so weeds and diseased foliage should never be included. Neighbourhood dogs can learn about digging for victory and may excavate your trench if you add desirable food waste.

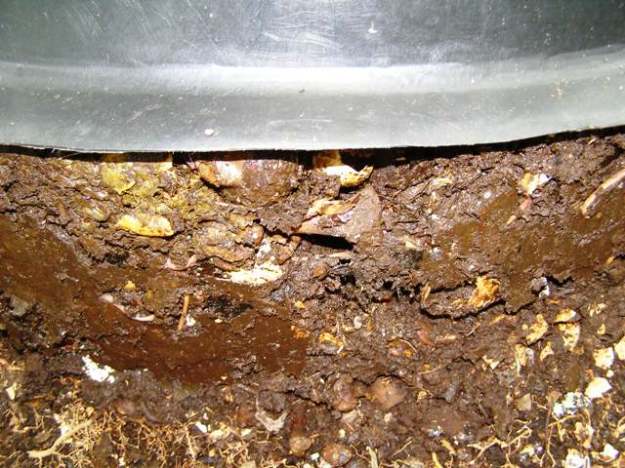
2)The black bin. We have one in the veg garden for kitchen scraps because our compost heaps are some distance away. It is tidy. The contents rot down and are something of a sludgy mess though this is fine to spread on the surrounding garden. The egg shells, however, remain whole and there can be a problem with spreading disease through potato peelings and brassicas with club root. It keeps dogs and cats out of the scraps but is not rodent proof. Because there is no heat generated, it will not destroy weed seeds or diseases (pathogens). The bin has no base to it which makes it easy to lift and move around. It acts more as a worm farm without provision to gather the worm tea. Our bin is full of tiger worms.

3) If you have many deciduous plants and a build up of too much leaf litter, raking it to a discreet area of the garden in heaps and leaving it for several months can be an easy solution. It needs plenty of rain to break down and the resulting humus will not be as nutritious as compost but it is clean to handle, adds texture to the soil and makes attractive mulch. The leaves piled to the right in the photo are about 30cm higher than the path on the left at this stage but still look tidy.

4) For small town gardens where tidiness is highly prized, the rolling compost drum may be an excellent option. It is not cheap to buy (expect to pay around $220 upwards) but it is very easy to use and as long as you rotate the drum often, it will make good compost faster than any other method we know. If you get your ingredients in the right proportions (more on this next time) and have sufficient moisture and oxygen, the contents should heat up to kill pathogens and seeds and will break down quickly, giving you small quantities of good quality compost in return for minimal effort. Home handypeople can possibly improvise a cheaper alternative.

5) Good compost does not smell, is generally dry and light textured and will leave you with clean hands so it is easy to handle. Sludgy muck, as in Step 2, is rotting organic matter where the breakdown is aided by worms and bacteria in a process which does not generate heat. It still has value but is nowhere near as pleasant to use. Well managed compost can generate enough heat in the process to kill seeds and unwanted fungi and diseases. We will look further at our tried and true techniques of how to generate clean compost in the next Outdoor Classroom.

Part two – making a hot compost mix.
Part three – making cold compost mix.

A laissez-faire approach to summer care for apple trees

Step by step instructions for pruning apple trees in winter are available here.

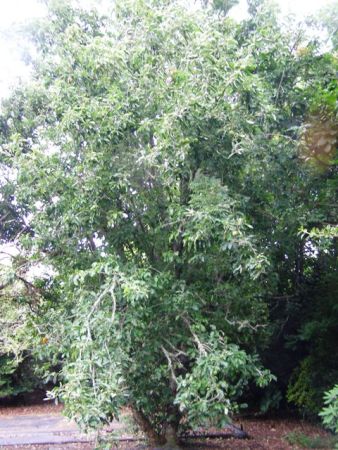
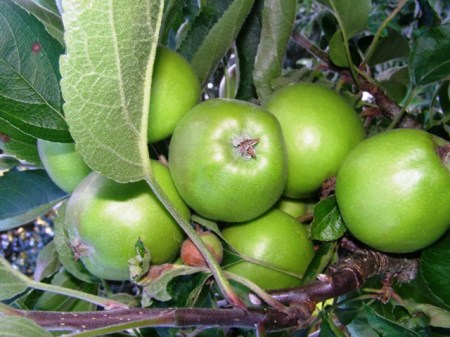
1) Apple trees can survive and continue to crop despite total neglect, but you will get much better results if you give them some attention. This huge old Granny Smith apple tree has not been touched for many, many years and shows why it is better to start with grafted apples on dwarf root stock. This tree is destined to be cut out in favour of our smaller trees which are easier to care for.

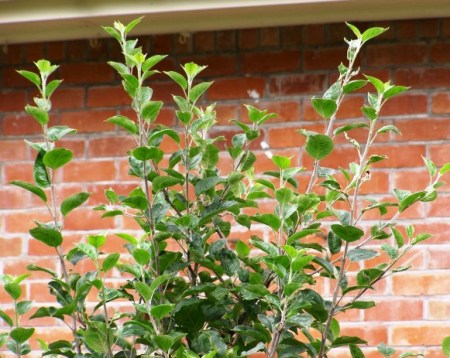
2) Apple trees are currently sporting their new growth which shows as long leafy whips. It is this growth which will give replacement fruiting spurs next summer. Ideally, you should be replacing all fruiting spurs on a two to four year cycle – cutting out old clusters and allowing fresh ones to take their place.

3) Trim the long whips back to about half their length to encourage the fruiting spurs to develop. Surplus whips can be cut right back to a bunch of fruit. You want to keep the tree open and uncluttered to allow the fruit to ripen well.

4) If your apples are looking too bunched up, it is best to thin out the fruit so that those that remain will be better quality. The tree will drop some surplus fruit before it is ripe, but thinning ensures that you keep the best specimens and stops the weight from breaking branches. Cut off very small or deformed fruit, reducing bunches to between two and four fruit. Some people recommend taking out the centre apple from a bunch to give those around it room to develop fully.

5) Codling moth is the single biggest problem and the caterpillars can take out an entire crop if left unchecked. They burrow into the apple, leaving nasty black tunnels. It is too late this season to try organic controls (pheromone traps and collars on the trunk of the tree). You need to start earlier in spring. We are resorting to insecticide spray this year to try and break the cycle. December to February are the times for spraying. It is recommended that it be done fortnightly but we will only do it once or twice.

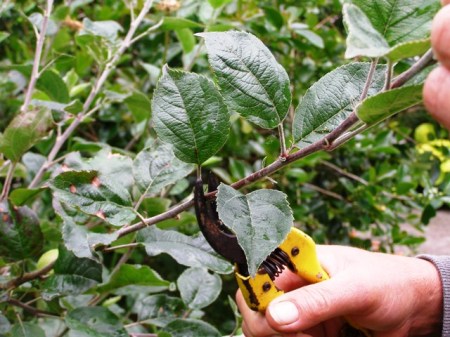
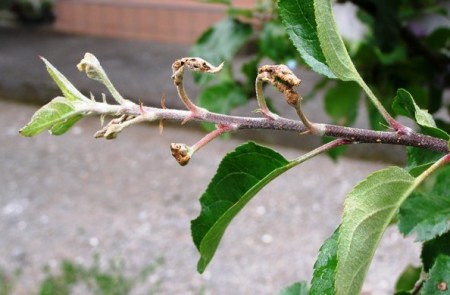
6) We do not carry out a rigorous spray programme so our trees show black spot, mildew, leaf curl and various other afflictions but we still get crops of apples. Traditional practice is to spray with both insecticide and fungicide every 10 to 14 days after the blossom petals have dropped until harvest – ask at your local garden centre for appropriate sprays. Spraying will give heavier crops of more attractive fruit but we are willing to trade that off by having additional trees and not spraying much at all. The leaf curl shown here is caused by a tiny orange midge and is easily dealt with by cutting off the tips of the branches and burning the leaves.

Construct your own Christmas tree (version one)

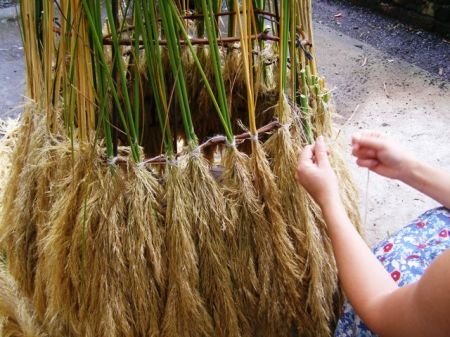
1) Inspired by a tree she saw in London, presumably made with pampas plumes, Camilla fancied trying an alternative to the traditional pine branch or the tacky tinsel alternative. As pampas is now banned in this country, we used toetoe plumes. Gathering the toetoe was the most difficult part of construction, especially with all the recent rain.

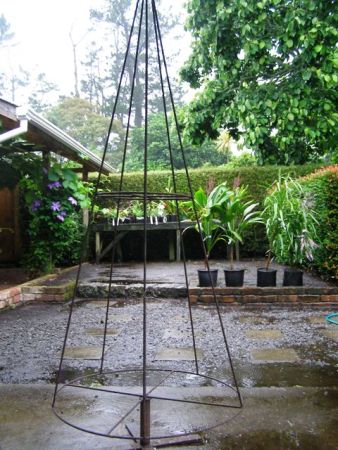
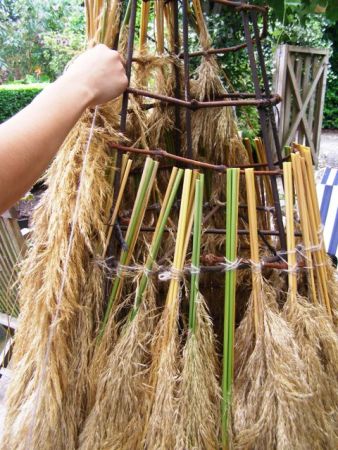
2) We were fortunate to be given a permanent metal base in the shape of a pyramid but you could construct your own from bamboo or a similar material. It needs to be fairly stable to work with easily. You need five or six vertical struts in order to be able to achieve a circular effect. Do not make it too wide if it needs to fit through a conventional door to get it inside when finished.

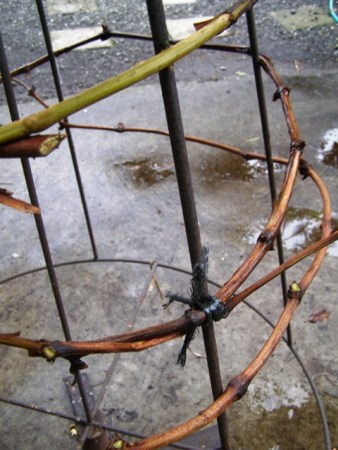
3) We wove additional horizontal supports into the frame at 20cm intervals using flexible lengths of old grape vine prunings.

4) Starting from the base, tie groups of about three toetoe plumes at a time, forming the bottom layer of the skirt. It needs to be sufficiently dense not to see through. We tied firmly with neutal coloured wool, securing the plumes to the frame and the rings of grapevine.

5) Layer additional skirts on top. Trim the surplus stems of each layer. It took us four layers to reach the top.

Kevin, Sharon and our Christmas tree

Kevin, Sharon and our Christmas tree

6) When it came to decorations, we decided less was more and just adorned our tree with a Trade Aid angel, the historic Jury family Christmas lights which need rewiring each year to work and the red and silver Spotlight reindeer (known here as Kevin and Sharon) at the base.

Postscript
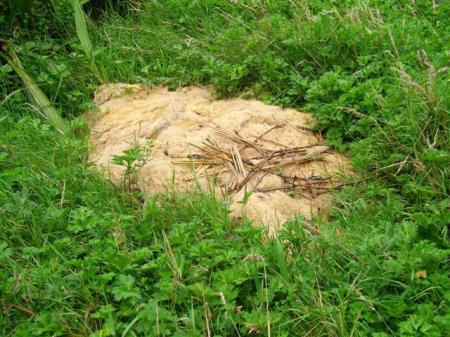
I recall the “Christmas is over in London” photo blog our daughter Camilla wrote as she wandered the streets of Maida Vale recording the slightly sad sight of Christmas trees put out for green waste collection. I found “Christmas is over in Tikorangi”. Mark said he would dispose of the carbon content of the toetoe Christmas tree. It looked disturbingly like a dead sheep when I came across it.

The second model DIY Christmas tree using the same frame but covered in grape vines is less inclined to moult and lacks the Pacifica charm of the toetoe, but is a more durable option.